
Identity & Access Management
Google Workspace
Google Workspace
Google Workspace: Permissions and setup
Connect your Google Workspace account to Atomicwork to enable automated actions and streamline various administrative tasks. This integration allows Atomicwork to manage users, groups, and data transfers within your Google Workspace environment on your behalf, enhancing efficiency for processes like employee onboarding and offboarding.
Understand the required permissions
To connect your Atomicwork and Google Workspace accounts, you need the following:
- Atomicwork admin access: You must have organization admin privileges in Atomicwork.
- Google Workspace admin access: You must be an administrator for your Google Workspace account to authorize the connection and grant the necessary permissions to Atomicwork.
Connect your Google Workspace account
Follow these steps to integrate Google Workspace with Atomicwork:
- Navigate to Settings in the left navigation menu.
- Under Settings, click on App Store.
- On the App Store page, find the Google Workspace application and click Connect.
- You will be redirected to Google's sign-in page. Choose the appropriate Google Workspace admin account or sign in with one if prompted.
- After signing in, Google will display a consent screen outlining the permissions Atomicwork requires. Review these permissions carefully.
- Click Allow to grant Atomicwork access to your Google Workspace account.
- Upon successful authorization, you will be redirected back to the Atomicwork application, and the Google Workspace integration will be active.
Review the permissions granted to Atomicwork
When you authorize the connection, Atomicwork requests specific permissions to perform tasks within your Google Workspace. These permissions include the ability to:
- View and manage data transfers between users in your organisation
- View and manage customer-related information
- View and manage the provisioning of user schemas on your domain
- View and manage the provisioning of domains for your customers
- View and manage group subscriptions on your domain
- View and manage the provisioning of groups on your domain
- View and manage the provisioning of users on your domain
Atomicwork requires these permissions to automate actions such as creating users, managing group memberships, and transferring files as part of automated journey actions.
Disconnect your Google Workspace account
If you need to remove the Google Workspace integration from Atomicwork:
- Navigate to Settings > App Store.
- Locate the Google Workspace application. It will indicate that it is connected.
- Click on the Google Workspace app card to open its settings.
- Click the Disconnect button.
- A confirmation dialog will appear. Confirm that you wish to disconnect.
- Once disconnected, Atomicwork will no longer have access to your Google Workspace account and cannot perform automated actions.
By connecting Google Workspace to Atomicwork, you unlock powerful automation capabilities that can save time and reduce manual effort for your IT and HR teams. To learn more about the specific automations you can configure, please refer to our article on Automate Google Workspace actions in journeys.
Google Workspace: Workflow actions
Automate your Google Workspace user management tasks, such as creating user accounts or managing group memberships, directly from Atomicwork by incorporating Google Workspace actions into your workflows. This can streamline processes like employee onboarding, offboarding, or team changes.
Before you can use Google Workspace actions in workflows, ensure that your Google Workspace account is connected to Atomicwork. This integration must be configured by an administrator, typically within the Integrations or App store section of Atomicwork's settings.
Understand available Google Workspace actions
You can add the following Google Workspace actions to your workflows:
- Create a user: Automatically provision a new user account in Google Workspace.
- Suspend a user: Temporarily block a user's access to Google Workspace services.
- Delete a user: Permanently remove a user account and their data from Google Workspace.
- Add a user to a group: Assign a user to one or more Google Workspace groups.
- Remove a user from a group: Revoke a user's membership from a Google Workspace group.
Anything defined in the Google Workspace API can be accessed through Atomicwork
Add Google Workspace actions to your workflows
Workflows in Atomicwork can be triggered by various events, such as when a new service request is created. You can then add Google Workspace actions to these workflows to automate user management tasks. Here’s how to add them:
- Navigate to Settings > Your Workspaces > (Deflection and Automation) Workflows.
- Click Create a workflow to start a new one, or select an existing workflow to modify it.
- In the workflow canvas, click on the Add action node (or the "+" button after a trigger or another action).
- In the right-hand panel that appears, select Google Workspace from the list of integrations.
- Choose the specific Google Workspace action you want to perform (e.g., "Create a user").
- Configure the required fields for the selected action. You can often use dynamic placeholders from the trigger event (like request details) to populate these fields. For example, when creating a user, you can use placeholders for the first name, last name, and email from the service request that triggered the workflow.
- Once configured, click Done.
- Add any other necessary actions or conditions to your workflow.
- Click Publish to save and activate your workflow.
Explore Google Workspace action details
Here’s more information on configuring each Google Workspace action within your workflows:
Create a Google Workspace user
This action is particularly useful for automating employee onboarding. When a new hire request triggers a workflow, you can automatically create their Google Workspace account.
- First name and Last name: Enter the user's names. You can use dynamic placeholders like
######{{requester.first_name}}and######{{requester.last_name}}. - Primary email: Specify the user's primary email address. Consider your company's email format (e.g.,
firstname.lastname@company.com) and use placeholders accordingly, such as######{{requester.first_name}}.######{{requester.last_name}}@yourcompany.com. - Password: Set an initial password for the user.
- Require password change at next login: It's a good security practice to select 'Yes' for this option, forcing the user to set their own password upon first login.
Tip: For temporary passwords, use a combination of dynamic placeholders to ensure uniqueness and strength, even if the user will change it soon. Refer to Google Workspace actions in journeys for more ideas on password placeholders, although the context here is workflows.
Add a user to a Google Workspace group
Use this action to automatically grant users access to necessary resources and mailing lists by adding them to relevant groups, for instance, as part of an onboarding workflow or when a user changes roles.
- User: Specify the email address of the Google Workspace user you want to add to a group. This user must already exist in Google Workspace.
- Group: Select the Google Workspace group to which the user should be added.
Note: You can add a user to one group per action. To add a user to multiple groups, configure multiple "Add a user to a group" actions in your workflow.
Remove a user from a Google Workspace group
This action is useful during offboarding processes or when a user's access rights change, requiring their removal from certain groups.
- User: Specify the email address of the Google Workspace user.
- Group: Select the Google Workspace group from which the user should be removed.
Suspend a Google Workspace user
Suspending a user temporarily blocks their access to Google Workspace services without deleting their data. This is useful for employees on extended leave or as an initial step in an offboarding workflow before account deletion.
When you suspend an account:
- The user's email, documents, calendars, and other data are not deleted.
- Shared documents remain accessible to collaborators.
- New email and calendar invitations are blocked.
To configure this action, you primarily need to specify:
- User: The email address of the Google Workspace user to suspend.
Delete a Google Workspace user
This action permanently removes a user and their associated data from Google Workspace. It's typically used as a final step in an offboarding workflow.
Caution: Deleting a user is an irreversible action. All their Gmail data, Drive files, and Calendar events will be permanently deleted. Consider suspending the user and transferring their Google Workspace files and events (as detailed for journeys) before proceeding with deletion.
To configure this action, you need to specify:
- User: The email address of the Google Workspace user to delete.
By leveraging Google Workspace actions within Atomicwork workflows, you can significantly reduce manual effort, ensure consistency in user management, and free up your IT team to focus on more strategic initiatives. These automations help maintain an up-to-date and secure Google Workspace environment in response to employee lifecycle events.
Google Workspace: SAML Single sign-on (SSO)
Your employees can securely access Atomicwork using their existing Google credentials. With Google SAML SSO enabled, administrators can centralize user authentication, simplify onboarding, and strengthen access security.
Why use Google SAML SSO
Enabling Google SAML SSO offers:
- Single sign-on (SSO): Users log in with their Google Workspace credentials, removing the need for a separate Atomicwork password.
- Improved security: Authentication is managed through Google, ensuring centralized access control and reduced risk.
- Simplified user management: Onboarding and offboarding employees is as easy as updating access in your Google Workspace directory.
Set up Google SAML SSO
Step 1: Configure the app in Google Admin Console
- Navigate to your Google Admin Console > Apps > Web and mobile apps.
- Click on Add App and choose Add custom SAML app.
- Enter a name for the app, for example, Atomicwork.
- In the next step, download the metadata XML.
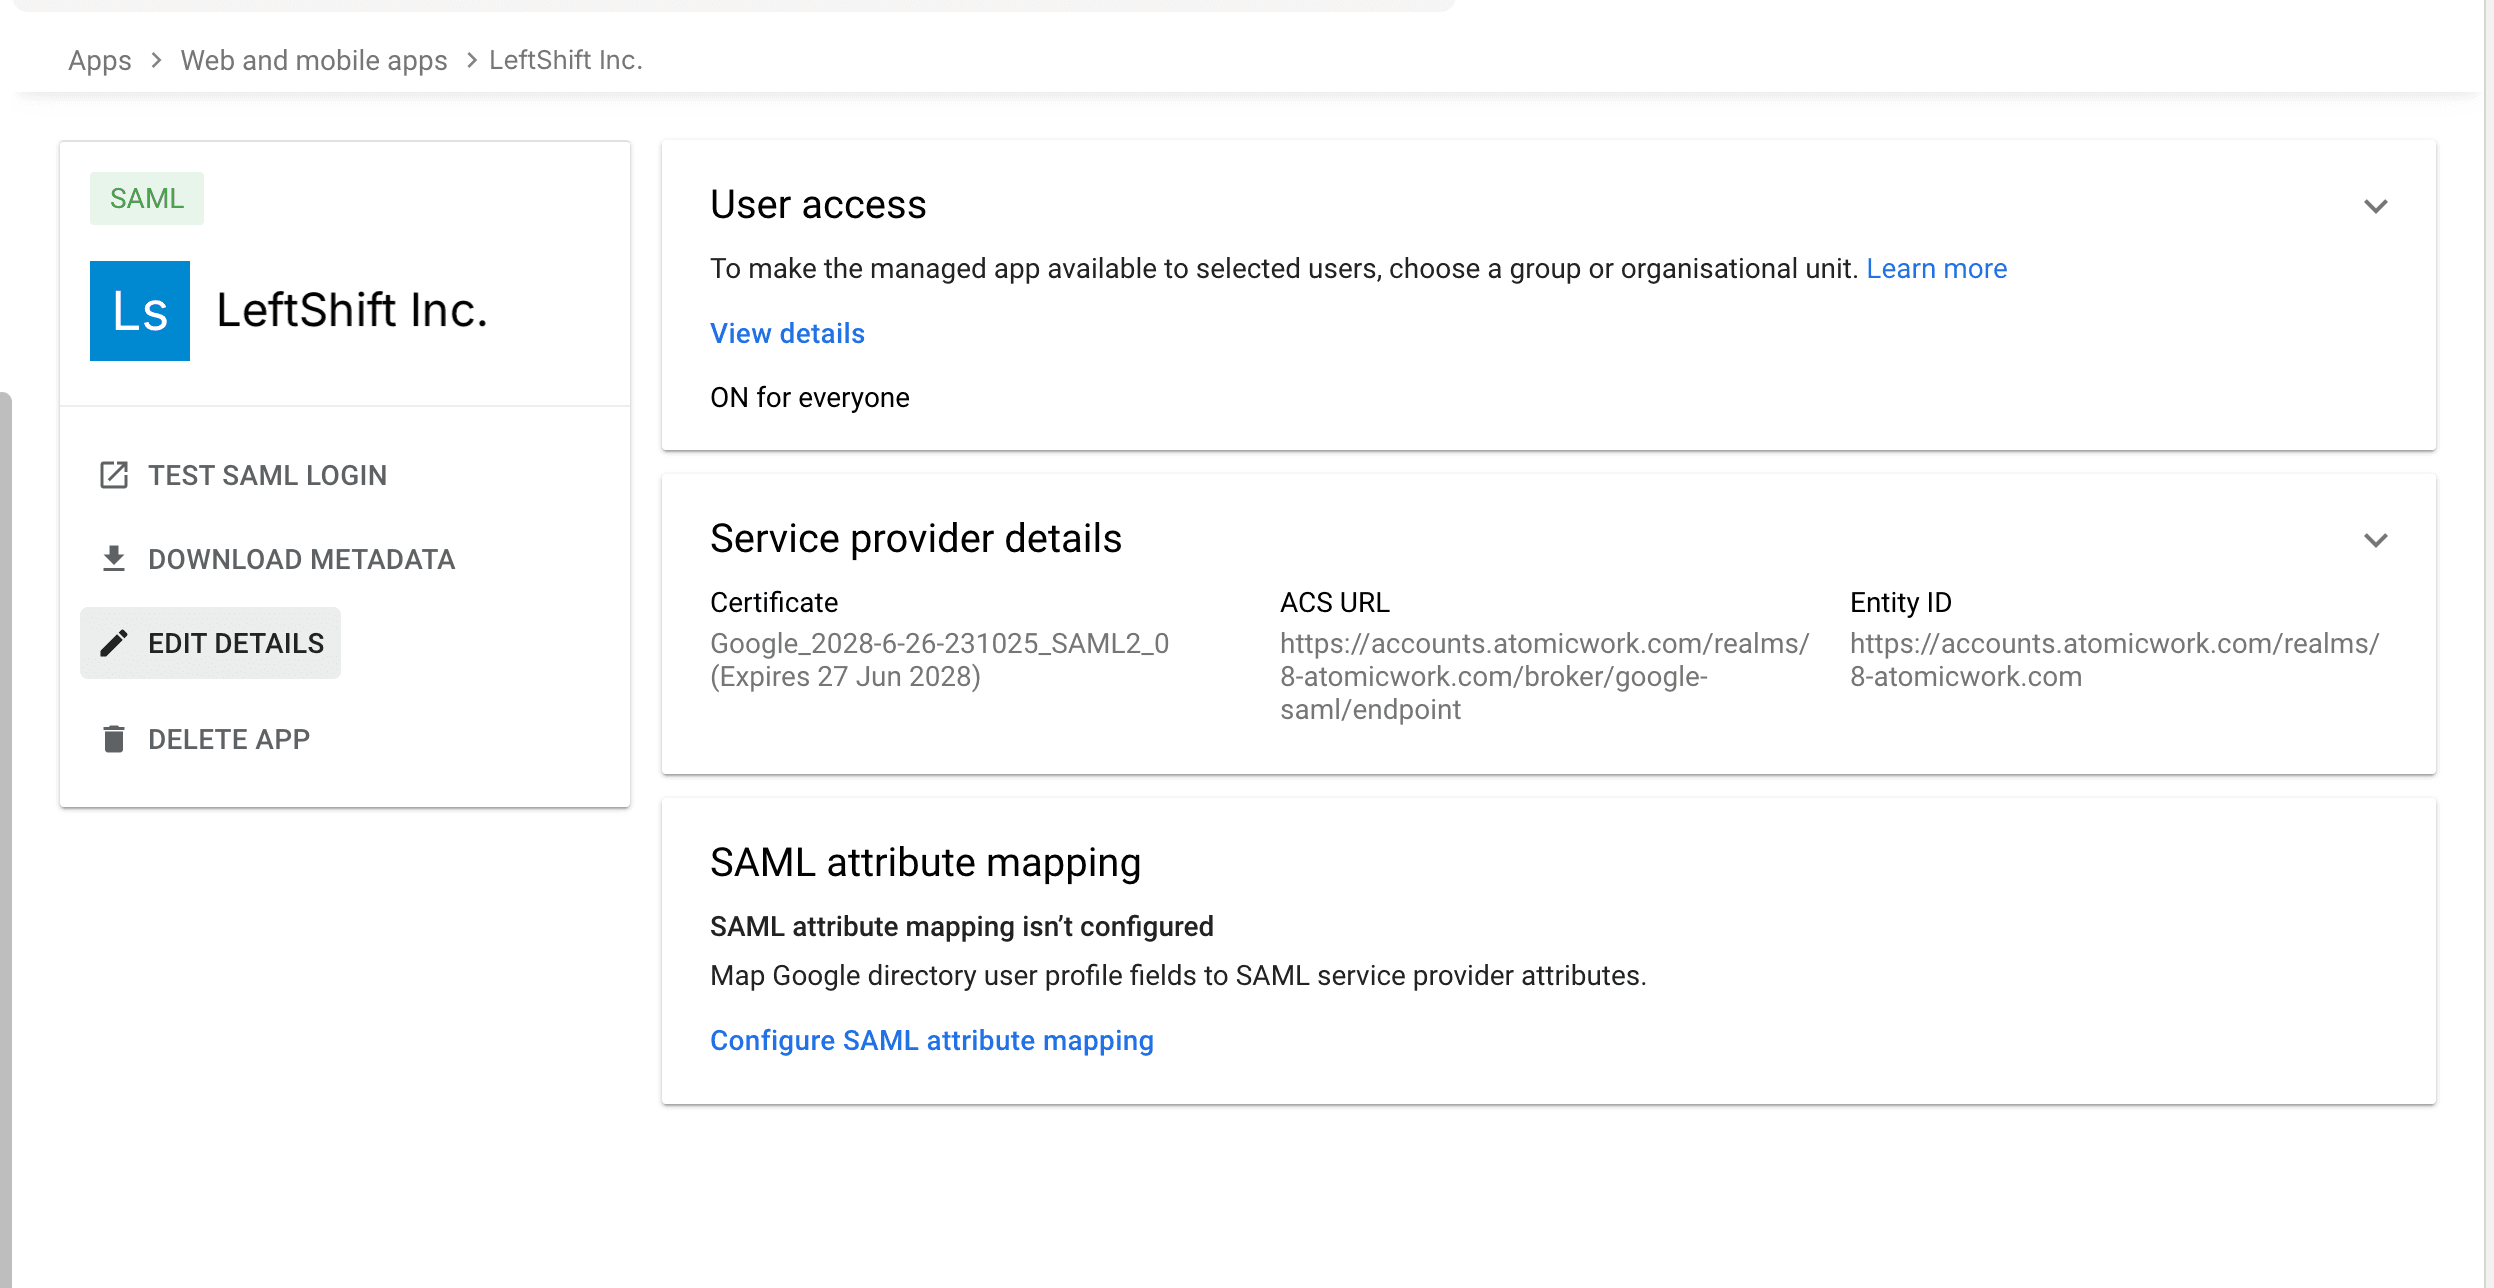
Step 2: Copy details from Atomicwork
- Switch to your Atomicwork account and navigate to Settings > Security > Authentication.
- Click on Enable next to Google SSO and locate the following details:
- Single sign-on URL (ACS URL)
- Audience URI (Entity ID)
- Paste these values into the corresponding fields in the Google Admin Console.
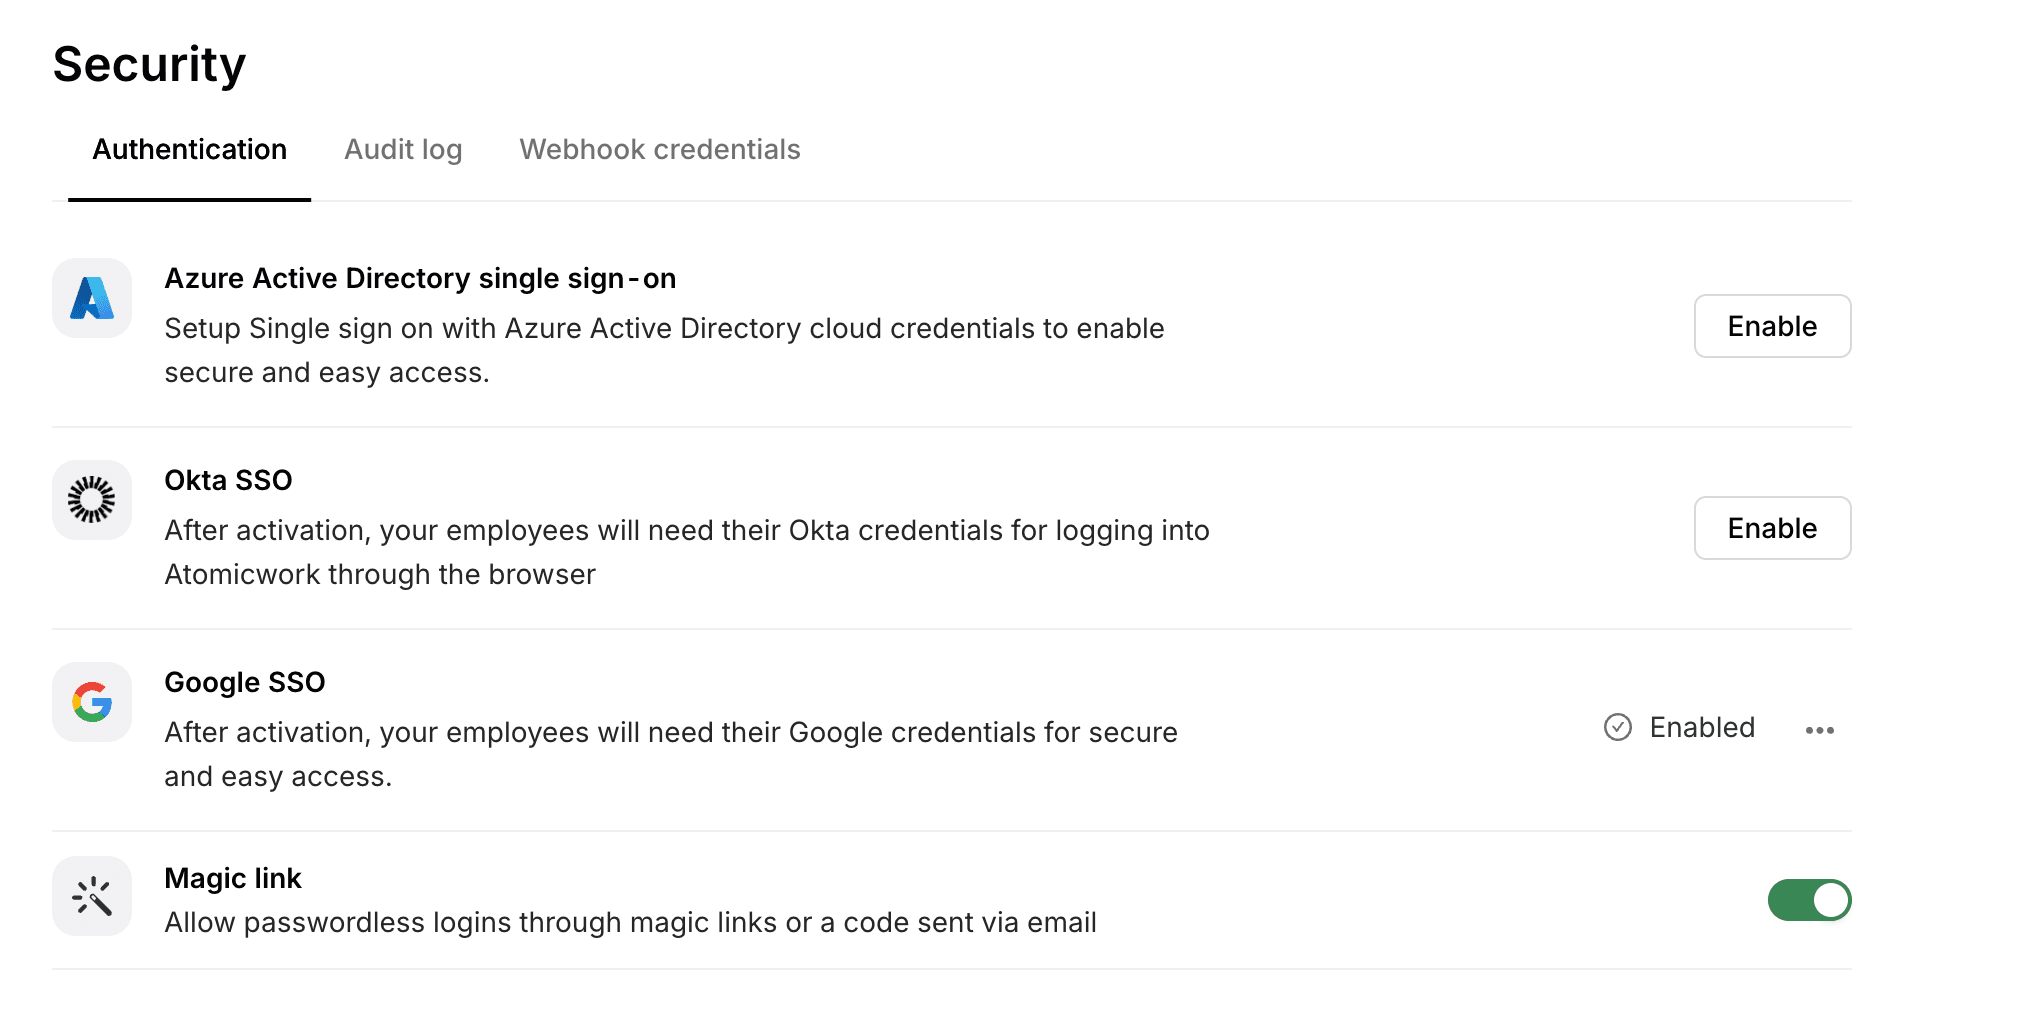
Step 3: Upload metadata from Google
- Navigate back to Atomicwork and go to Settings > Security > Authentication > Google SSO again.
- Paste the Google metadata XML into the Metadata field.
- Click Connect to complete the configuration.
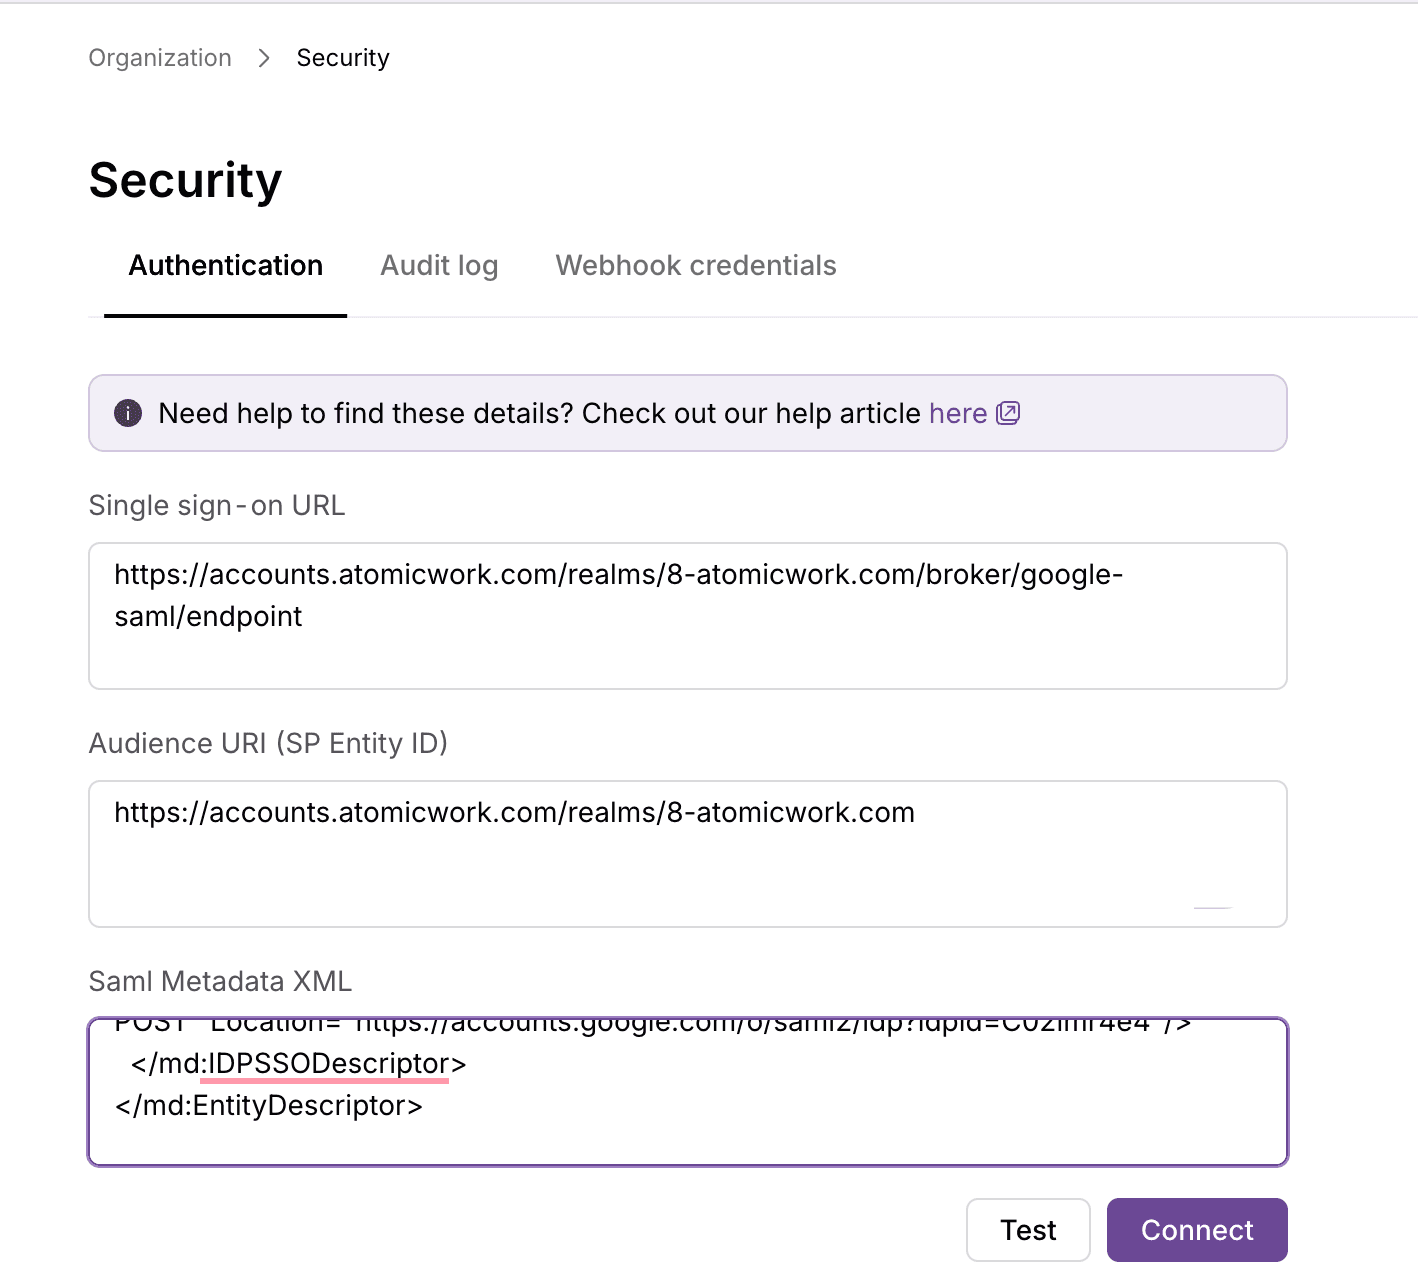
Step 4: Assign access in Google
- In the Google Admin Console, assign the app to the appropriate users or groups.
Now, employees will see a Continue with Google button on the Atomicwork login screen. They can use their Google Workspace credenti