
MCP Store
Custom MCP
Custom MCP
Add your own MCP server to Atomicwork
Add your own MCP servers to Atomicwork when the tool you need isn't in the built-in catalog, so your AI Coworkers can use it.
Atomicwork comes with a catalog of ready-to-use MCP servers, marked Official MCP or Managed by Atomicwork. When a tool your business relies on isn't in that catalog, Custom MCP lets you add it yourself. Once connected, its tools become available to your AI Coworkers, just like the built-in ones.
Understand how it works
A Model Context Protocol (MCP) server exposes a set of tools over a standard protocol. When you add one:
- You point Atomicwork at the server's URL.
- Atomicwork checks the server's configuration and pre-fills what it can.
- You review the details, then authenticate and connect.
- Atomicwork fetches the server's tools, and they become available to your AI Coworkers. When a coworker uses a tool, the request flows through the MCP server to the underlying service, and the result comes back.
Check the prerequisites
Before you begin the setup, ensure that you meet the following requirements:
- Atomicwork admin access: You need the Manage MCP connections permission. Only an admin can add a custom MCP.
- A remote MCP server: The server must support streamable HTTP or SSE transport. Atomicwork does not host MCP servers, so the server must already be hosted.
- A publicly reachable HTTPS URL: Atomicwork rejects URLs that are not HTTPS, or that resolve to a private, loopback, or internal network address.
- Credentials: The authentication method the server uses (OAuth or an API key), along with any credentials it requires.
- A logo (optional): PNG, JPG, or JPEG.
Only add MCP servers you trust. A connected server's tools can be called by your AI Coworkers on your data and systems. Treat a custom MCP like any other integration with that level of access, and review the server and its provider before you connect it.
Enter the server URL
- Log in to Atomicwork and navigate to AI Workforce > MCP Tools.
- In the top right, click Add Custom MCP.
- Enter the Server URL, which is the endpoint Atomicwork connects to, and then click Next.
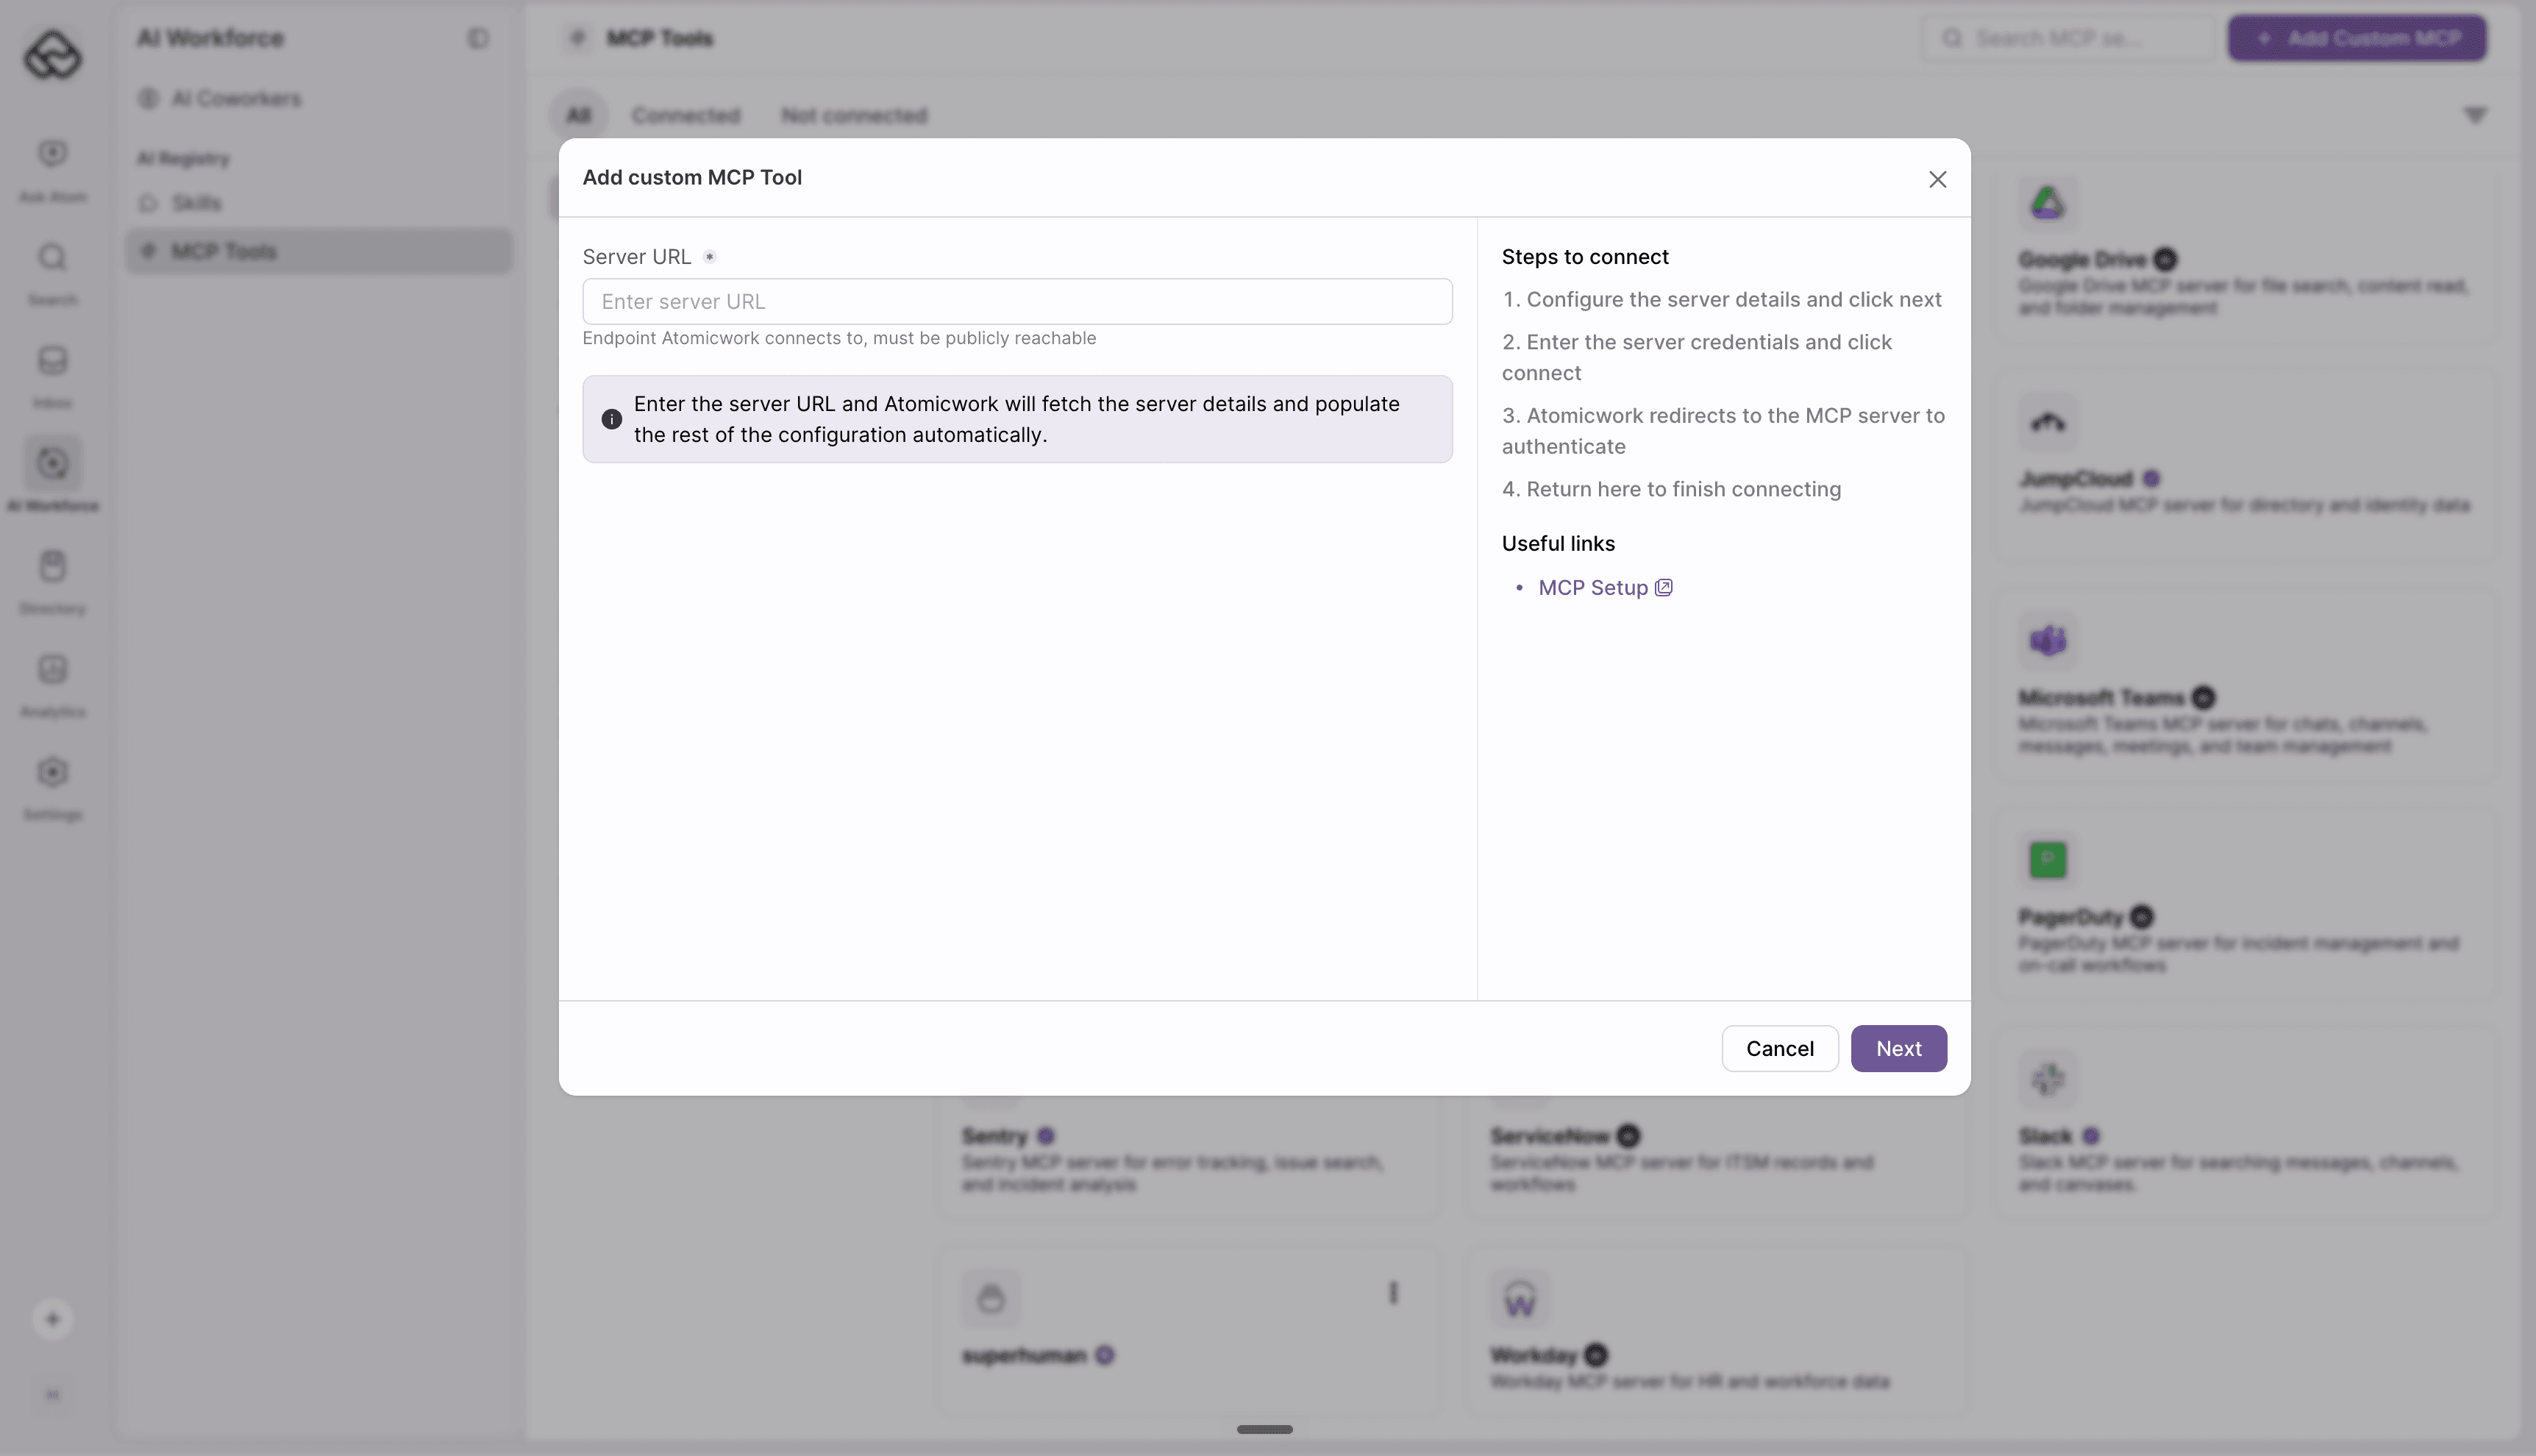
Atomicwork checks the server's configuration and pre-fills what it can. Refer to the following table to understand the message you receive:
| Message | What it means |
|---|---|
| Configuration fetched automatically. Review before continuing. | The server published complete authentication details. |
| Part of the configuration was fetched automatically. | The server published some details. Complete the remaining required fields. |
| Configuration could not be fetched automatically. | The server publishes no discovery details, which is normal for API key and bearer token servers. Set up the fields manually. |
Configure the server details
Review the pre-filled configuration, and then add the details that control how the MCP appears in Atomicwork.
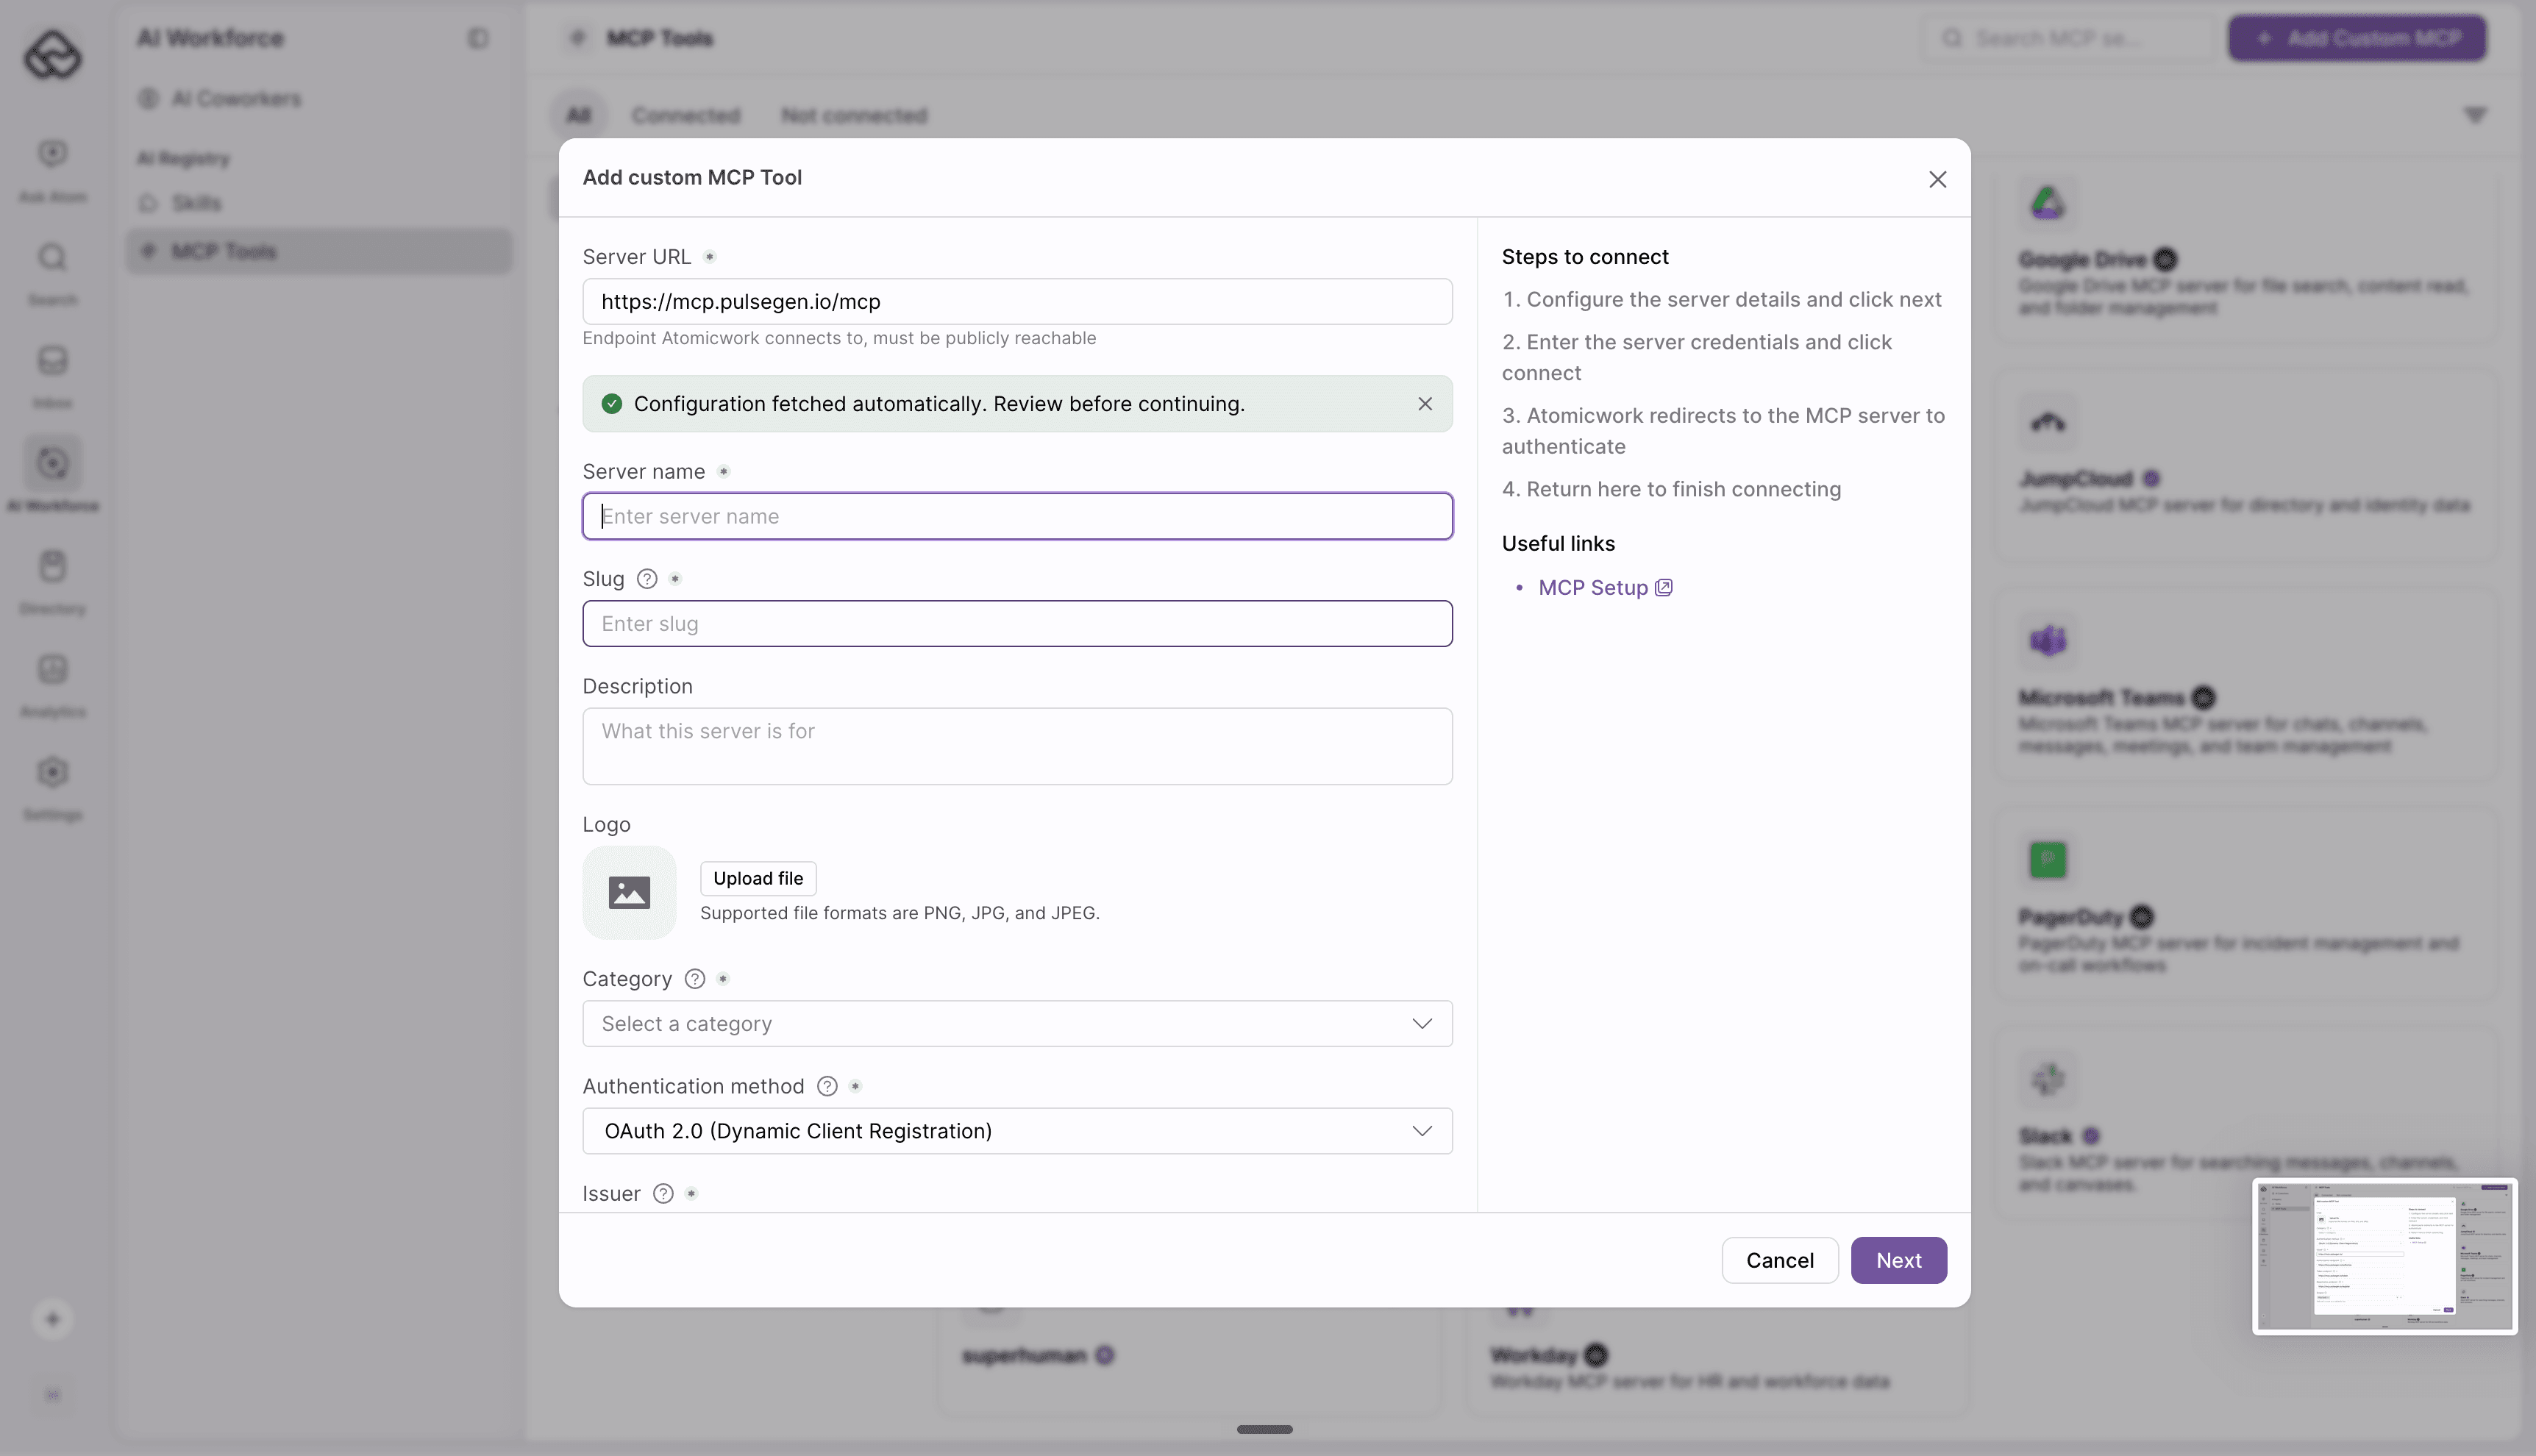
| Field | Required | Description |
|---|---|---|
| Server name | Yes | The name shown on the tile. |
| Slug | Yes | Unique ID used in the tool's URL. Auto-filled from the name. Use lowercase letters and numbers only. You cannot change it later. |
| Description | No | A short line on what the server is for. |
| Logo | No | PNG, JPG, or JPEG. |
| Category | Yes | Groups the server in the MCP tools list so it is easier to find. Defaults to Others. |
| Authentication method | Yes | How Atomicwork authenticates with the server. |
Choose the authentication method
The fields shown depend on the method you select.
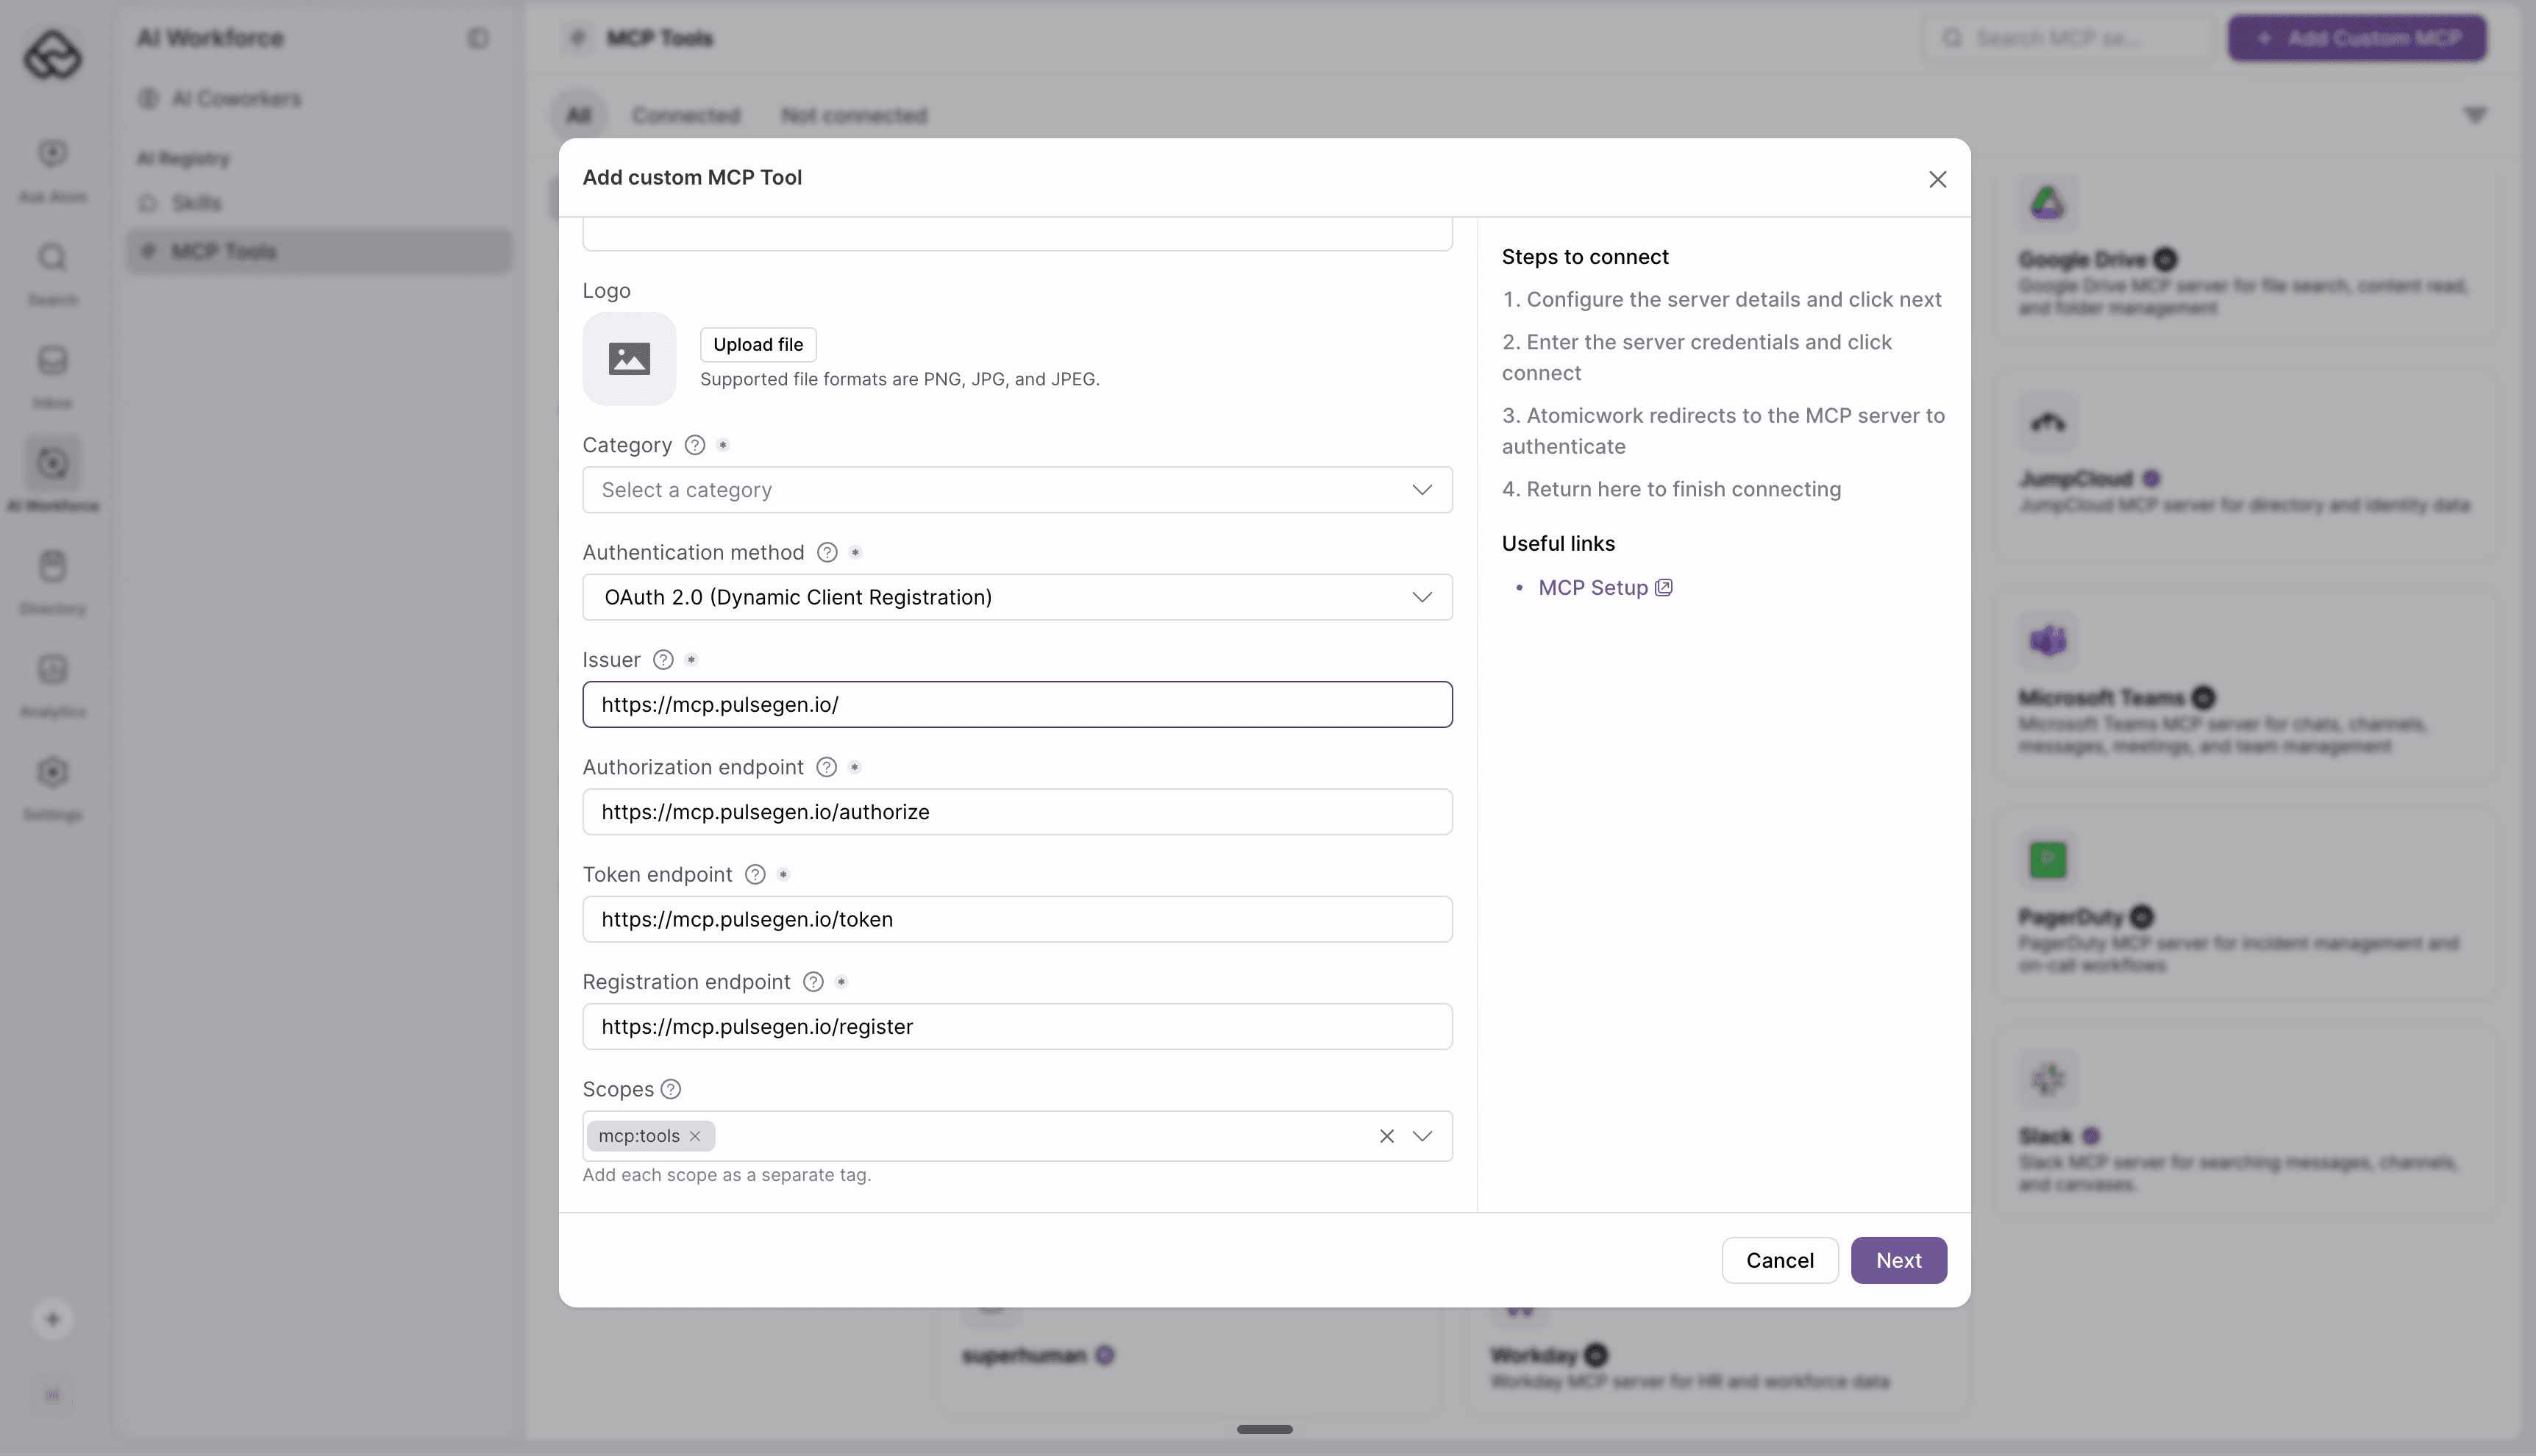
| Method | What you provide | What Atomicwork sends |
|---|---|---|
| No authentication | Nothing. | No authentication header. |
| Bearer token | Nothing here. You enter the token on the next step. | Authorization: Bearer <token> |
| API key | Header name, which defaults to X-API-Key. | <Header name>: <key> |
| Basic auth | Nothing here. You enter the username and password on the next step. | Authorization: Basic <credentials> |
| Custom headers | Nothing here. You define the header and value pairs on the next step. | One header per pair. |
| OAuth 2.0 | Issuer, authorization endpoint, token endpoint, client ID, client secret, and scopes. | Authorization: Bearer <access token>, refreshed automatically. |
| OAuth 2.0 (Dynamic Client Registration) | Issuer, authorization endpoint, token endpoint, registration endpoint, and scopes. No client ID or secret is needed, because Atomicwork registers a client for you. | Authorization: Bearer <access token>, refreshed automatically. |
Discovery pre-fills the OAuth endpoints wherever the server publishes them. Atomicwork offers OAuth 2.0 (Dynamic Client Registration) only when the server advertises support for it. When it does, this method is pre-selected, because you do not have to create an OAuth app on the vendor's side. Choose OAuth 2.0 when the vendor requires you to create the OAuth client yourself and paste its client ID and secret. Add each scope as a separate tag.
Click Next. The server is now saved in your workspace, but it is not connected yet.
Connect the server
On the connection page, authenticate using the server's method:
- OAuth: Click Connect. The server opens in a new tab so you can authorize access, and then you return to Atomicwork and the connection completes automatically.
- API key, bearer token, basic auth, or custom headers: Enter the credentials, and then click Connect. For custom headers, add one row per header, with the header name on the left and its value on the right.
- Servers that need no credentials: Click Connect.
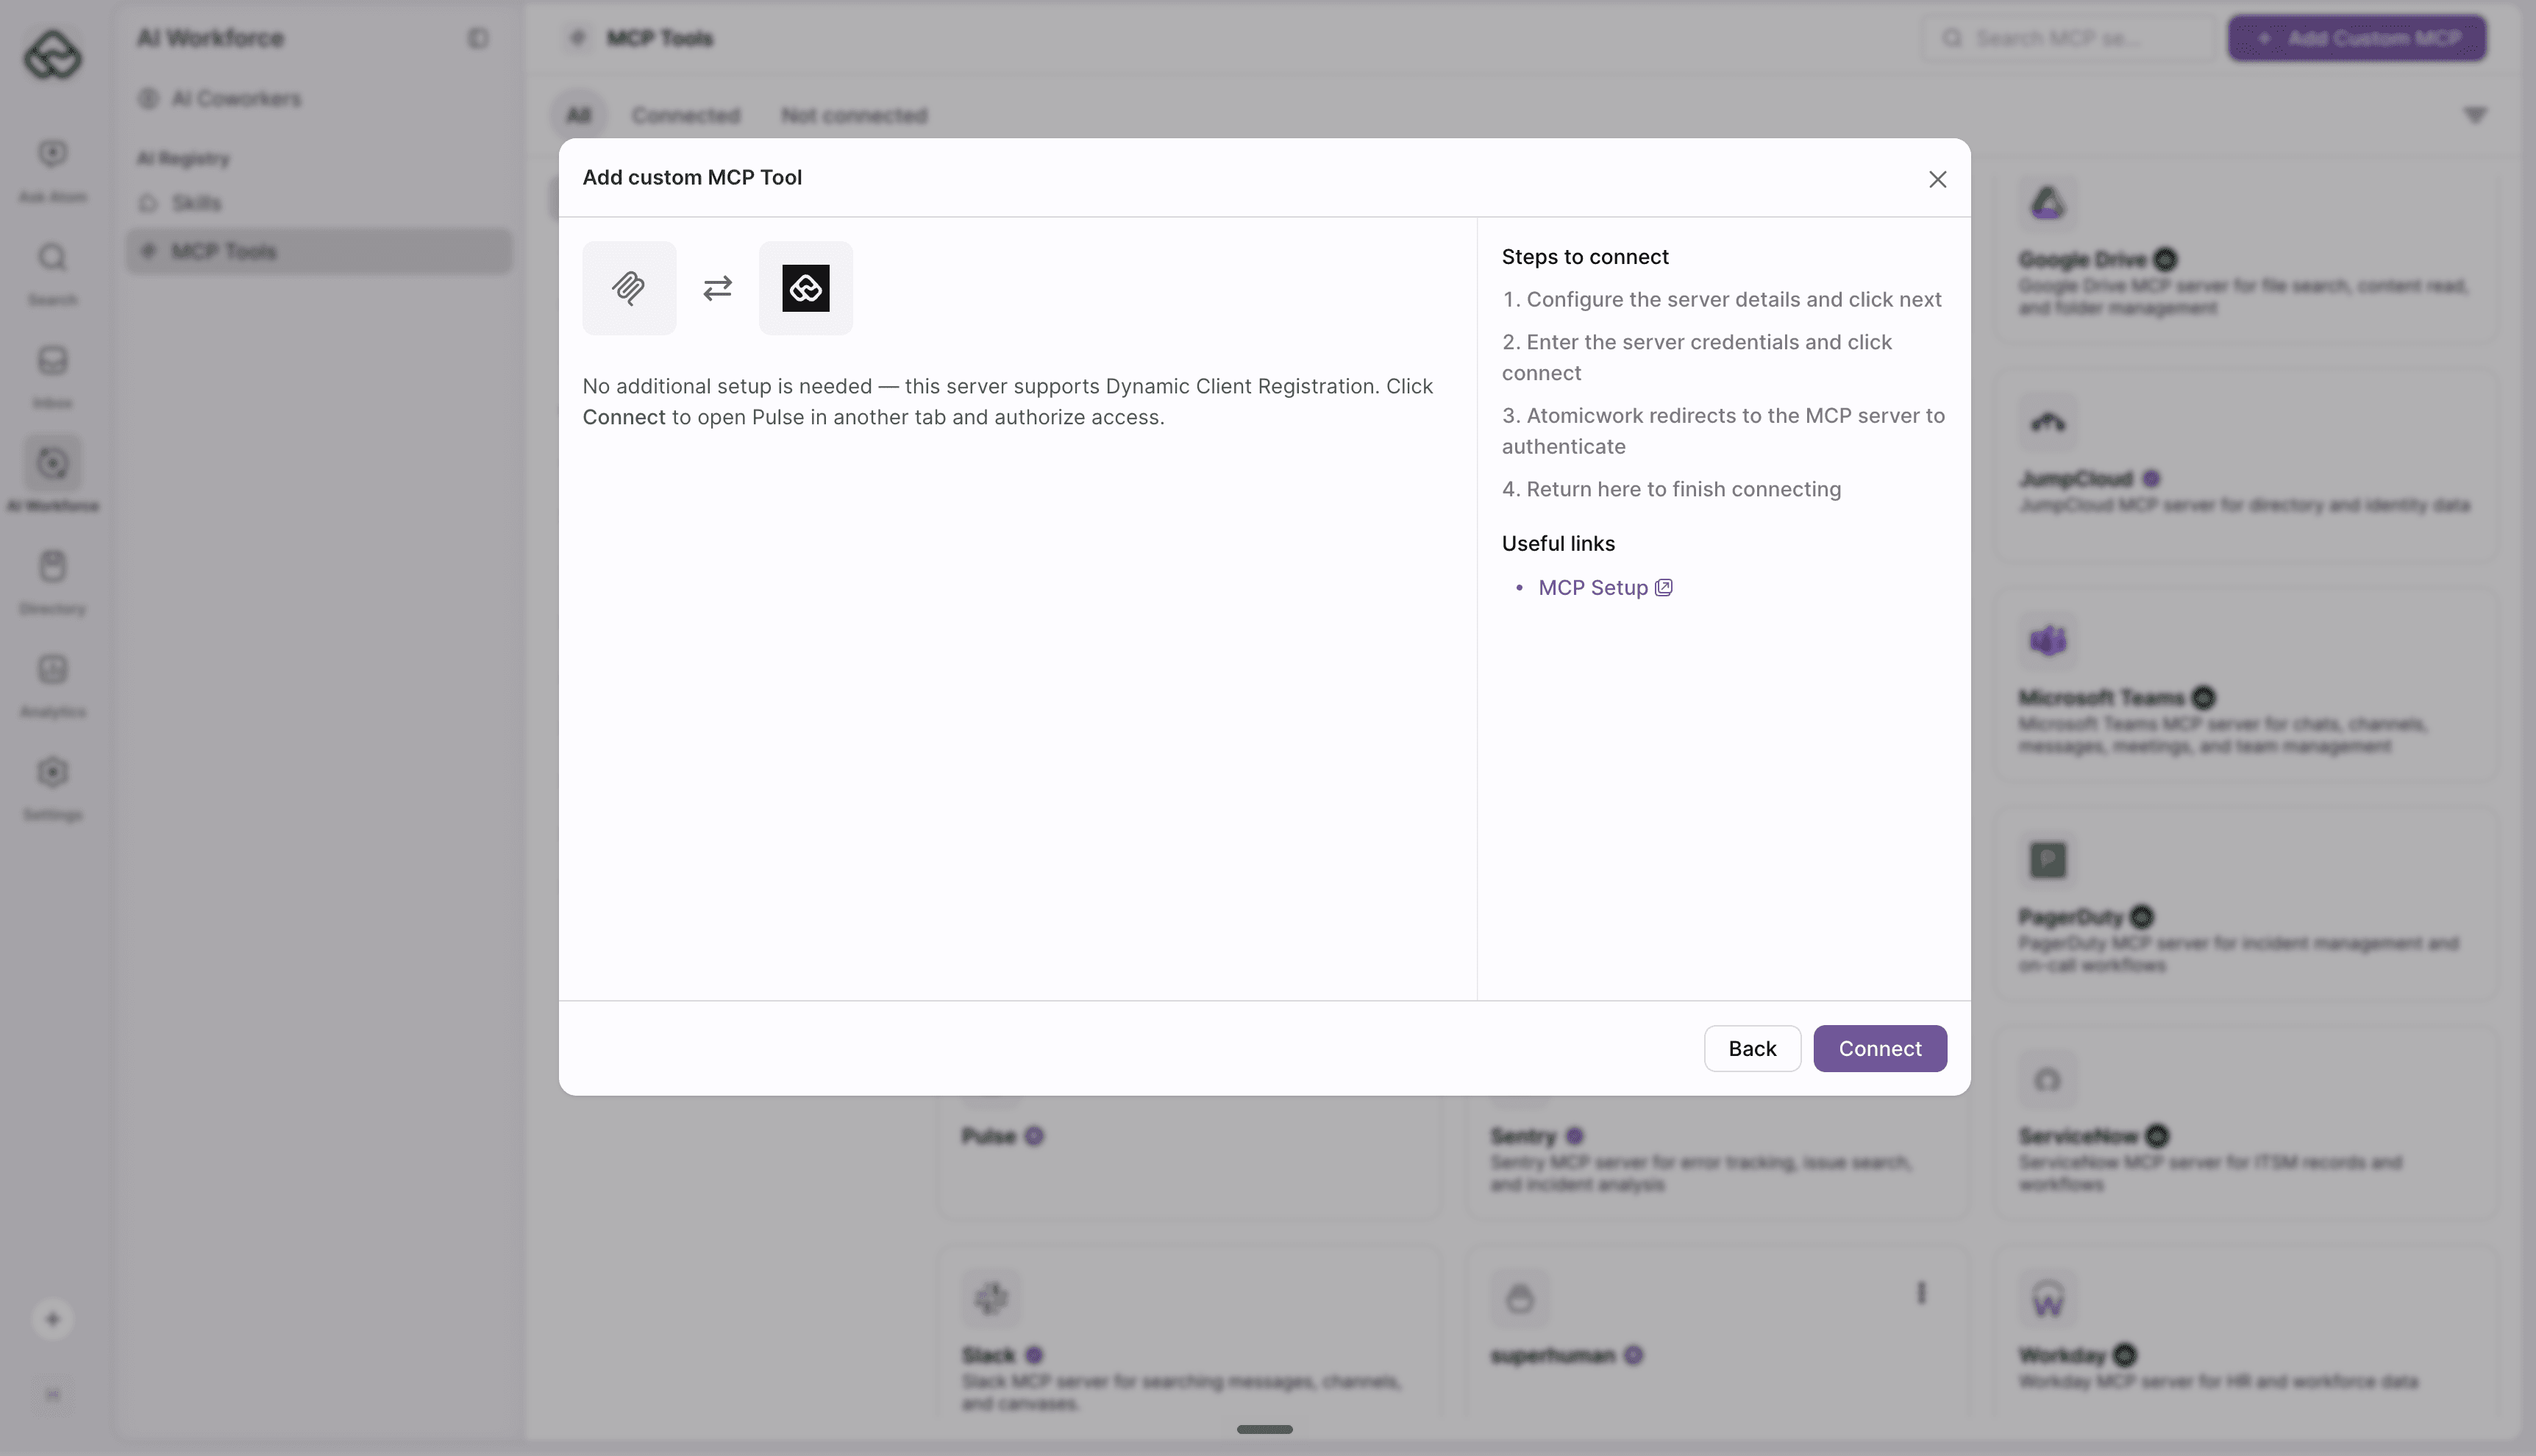
While you authorize, the dialog shows that authentication is in progress. If the tab does not open, which usually happens because your browser blocked the pop-up, use the link in the dialog to open it manually.
Complete the authorization within 10 minutes. The consent request expires after that, and you need to click Connect again.
Once the connection is established and authenticated, Atomicwork confirms that you are connected. Click Complete.
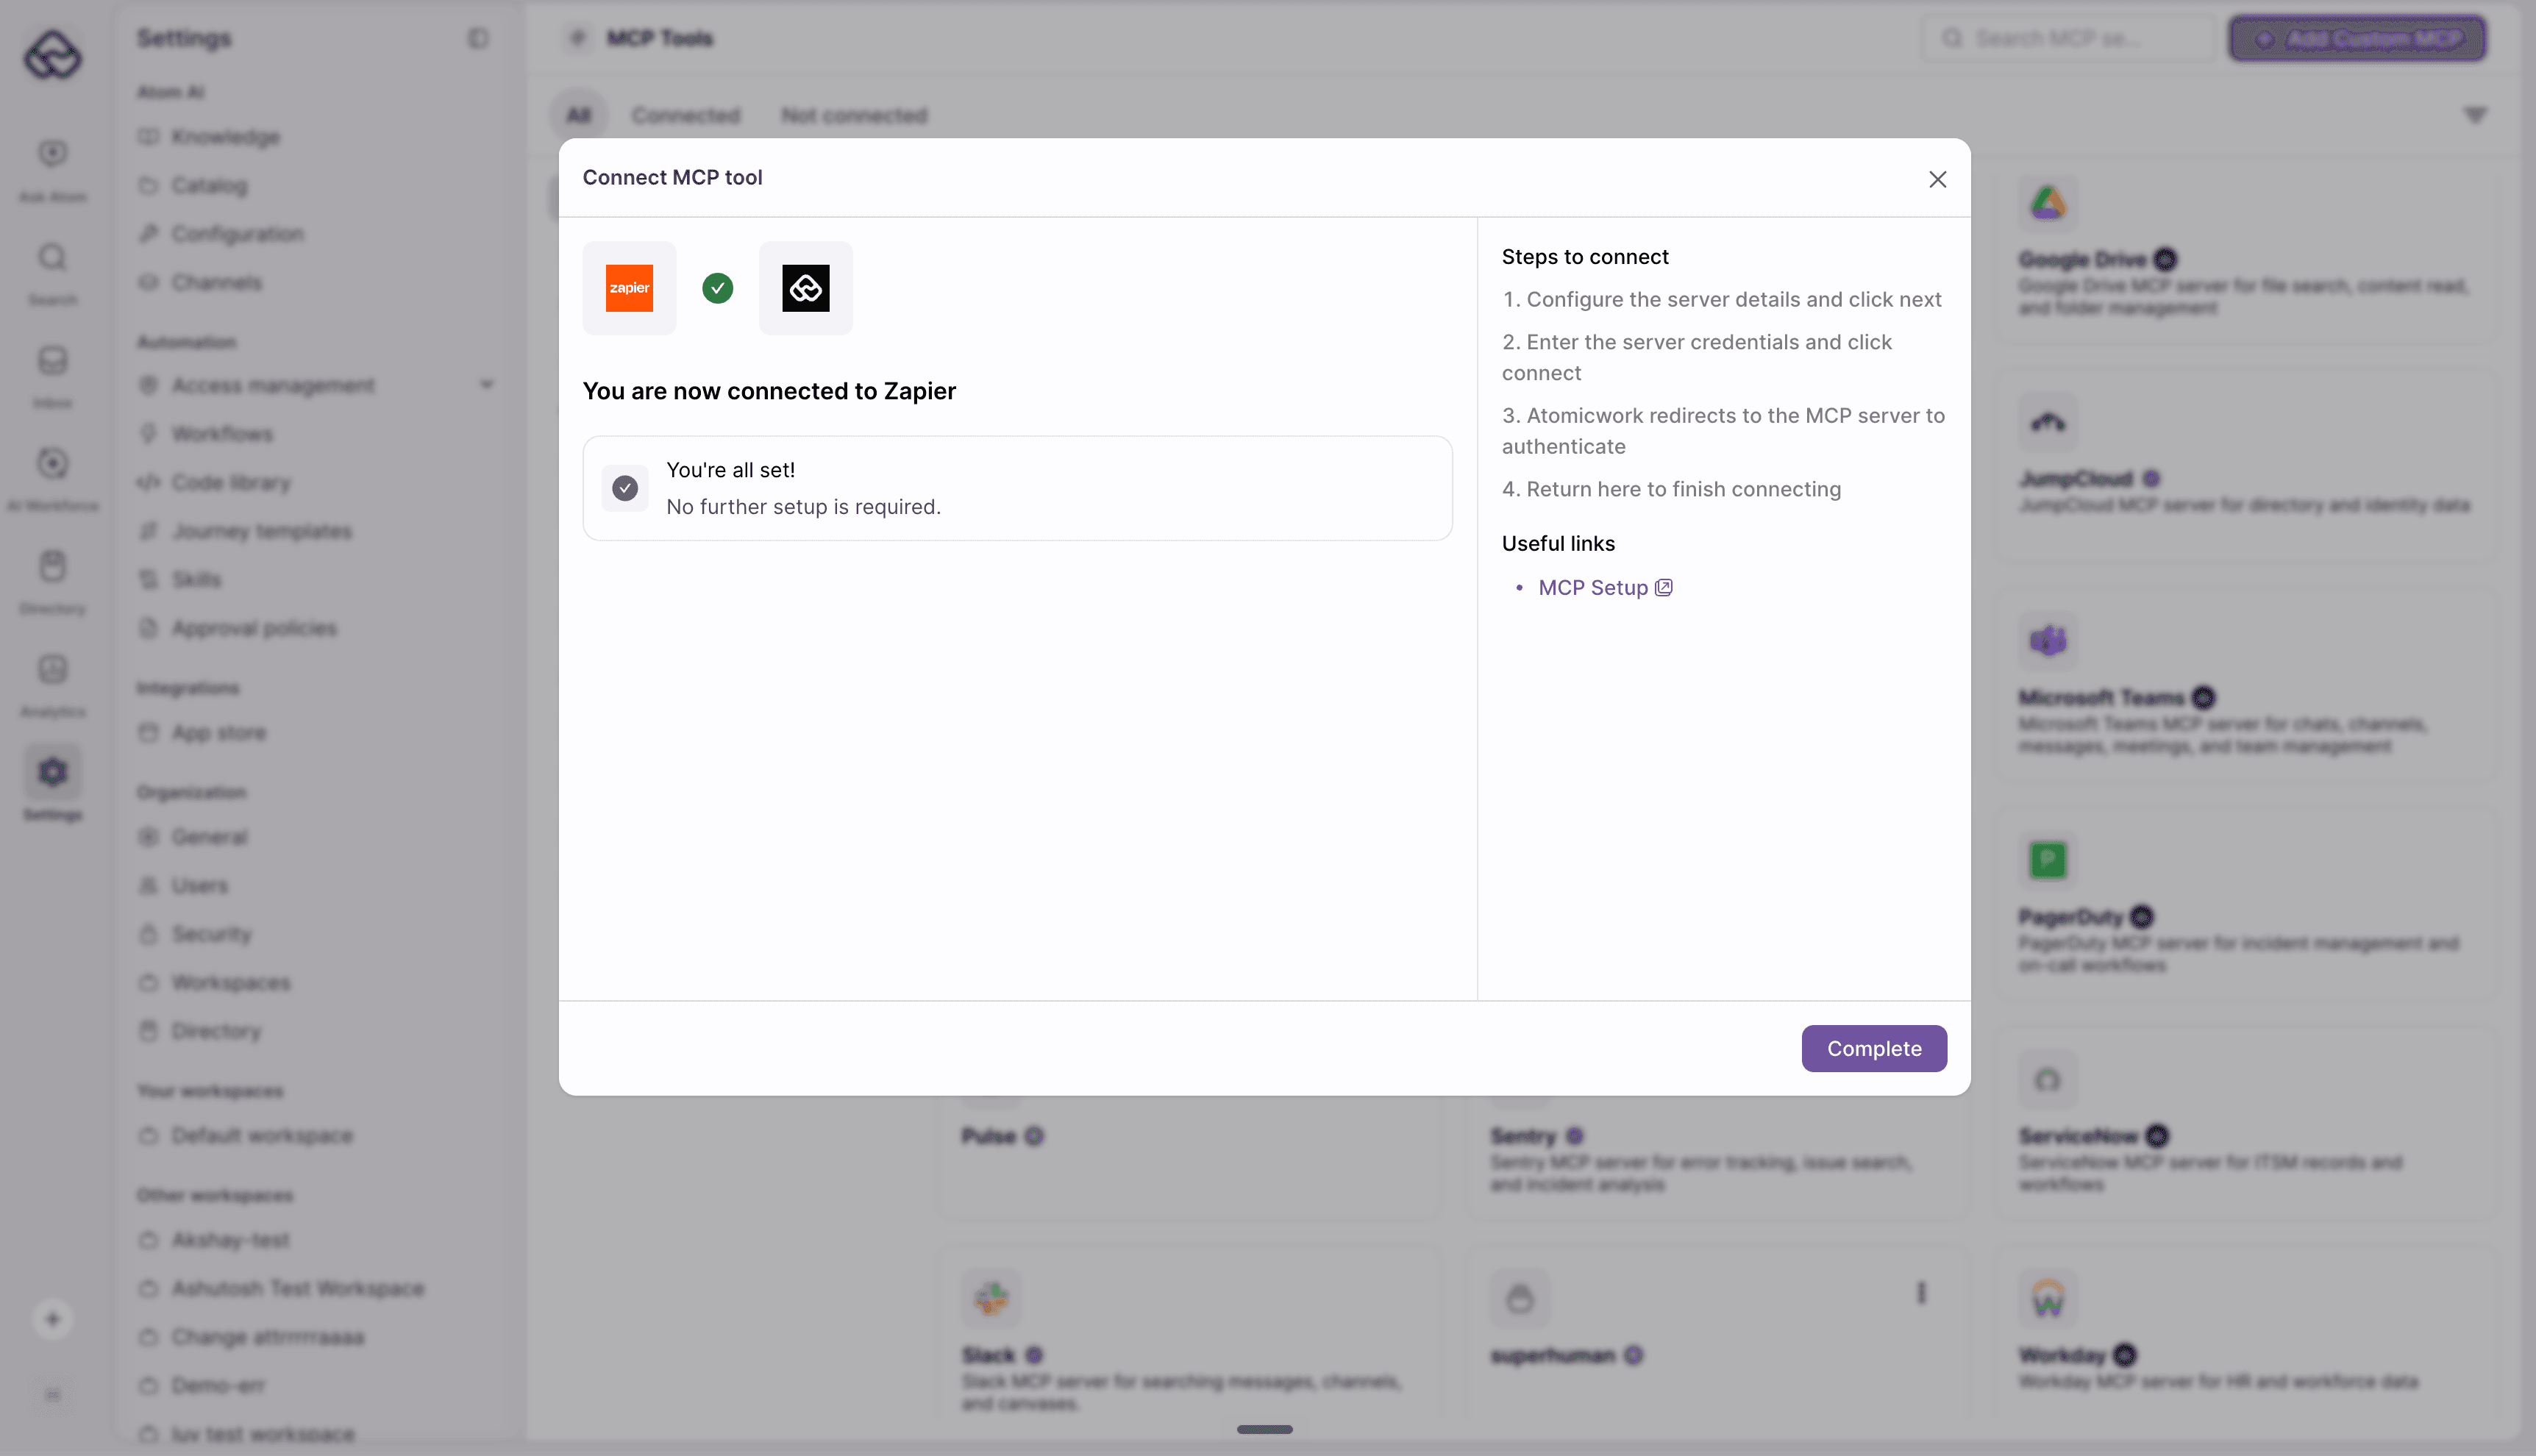
The server now appears in the MCP tools list marked Custom MCP. To find your custom servers quickly, use the type filter on the list and select Custom.
Enable tools for your AI Coworkers
Open the server from MCP Tools to see the tools it exposes.
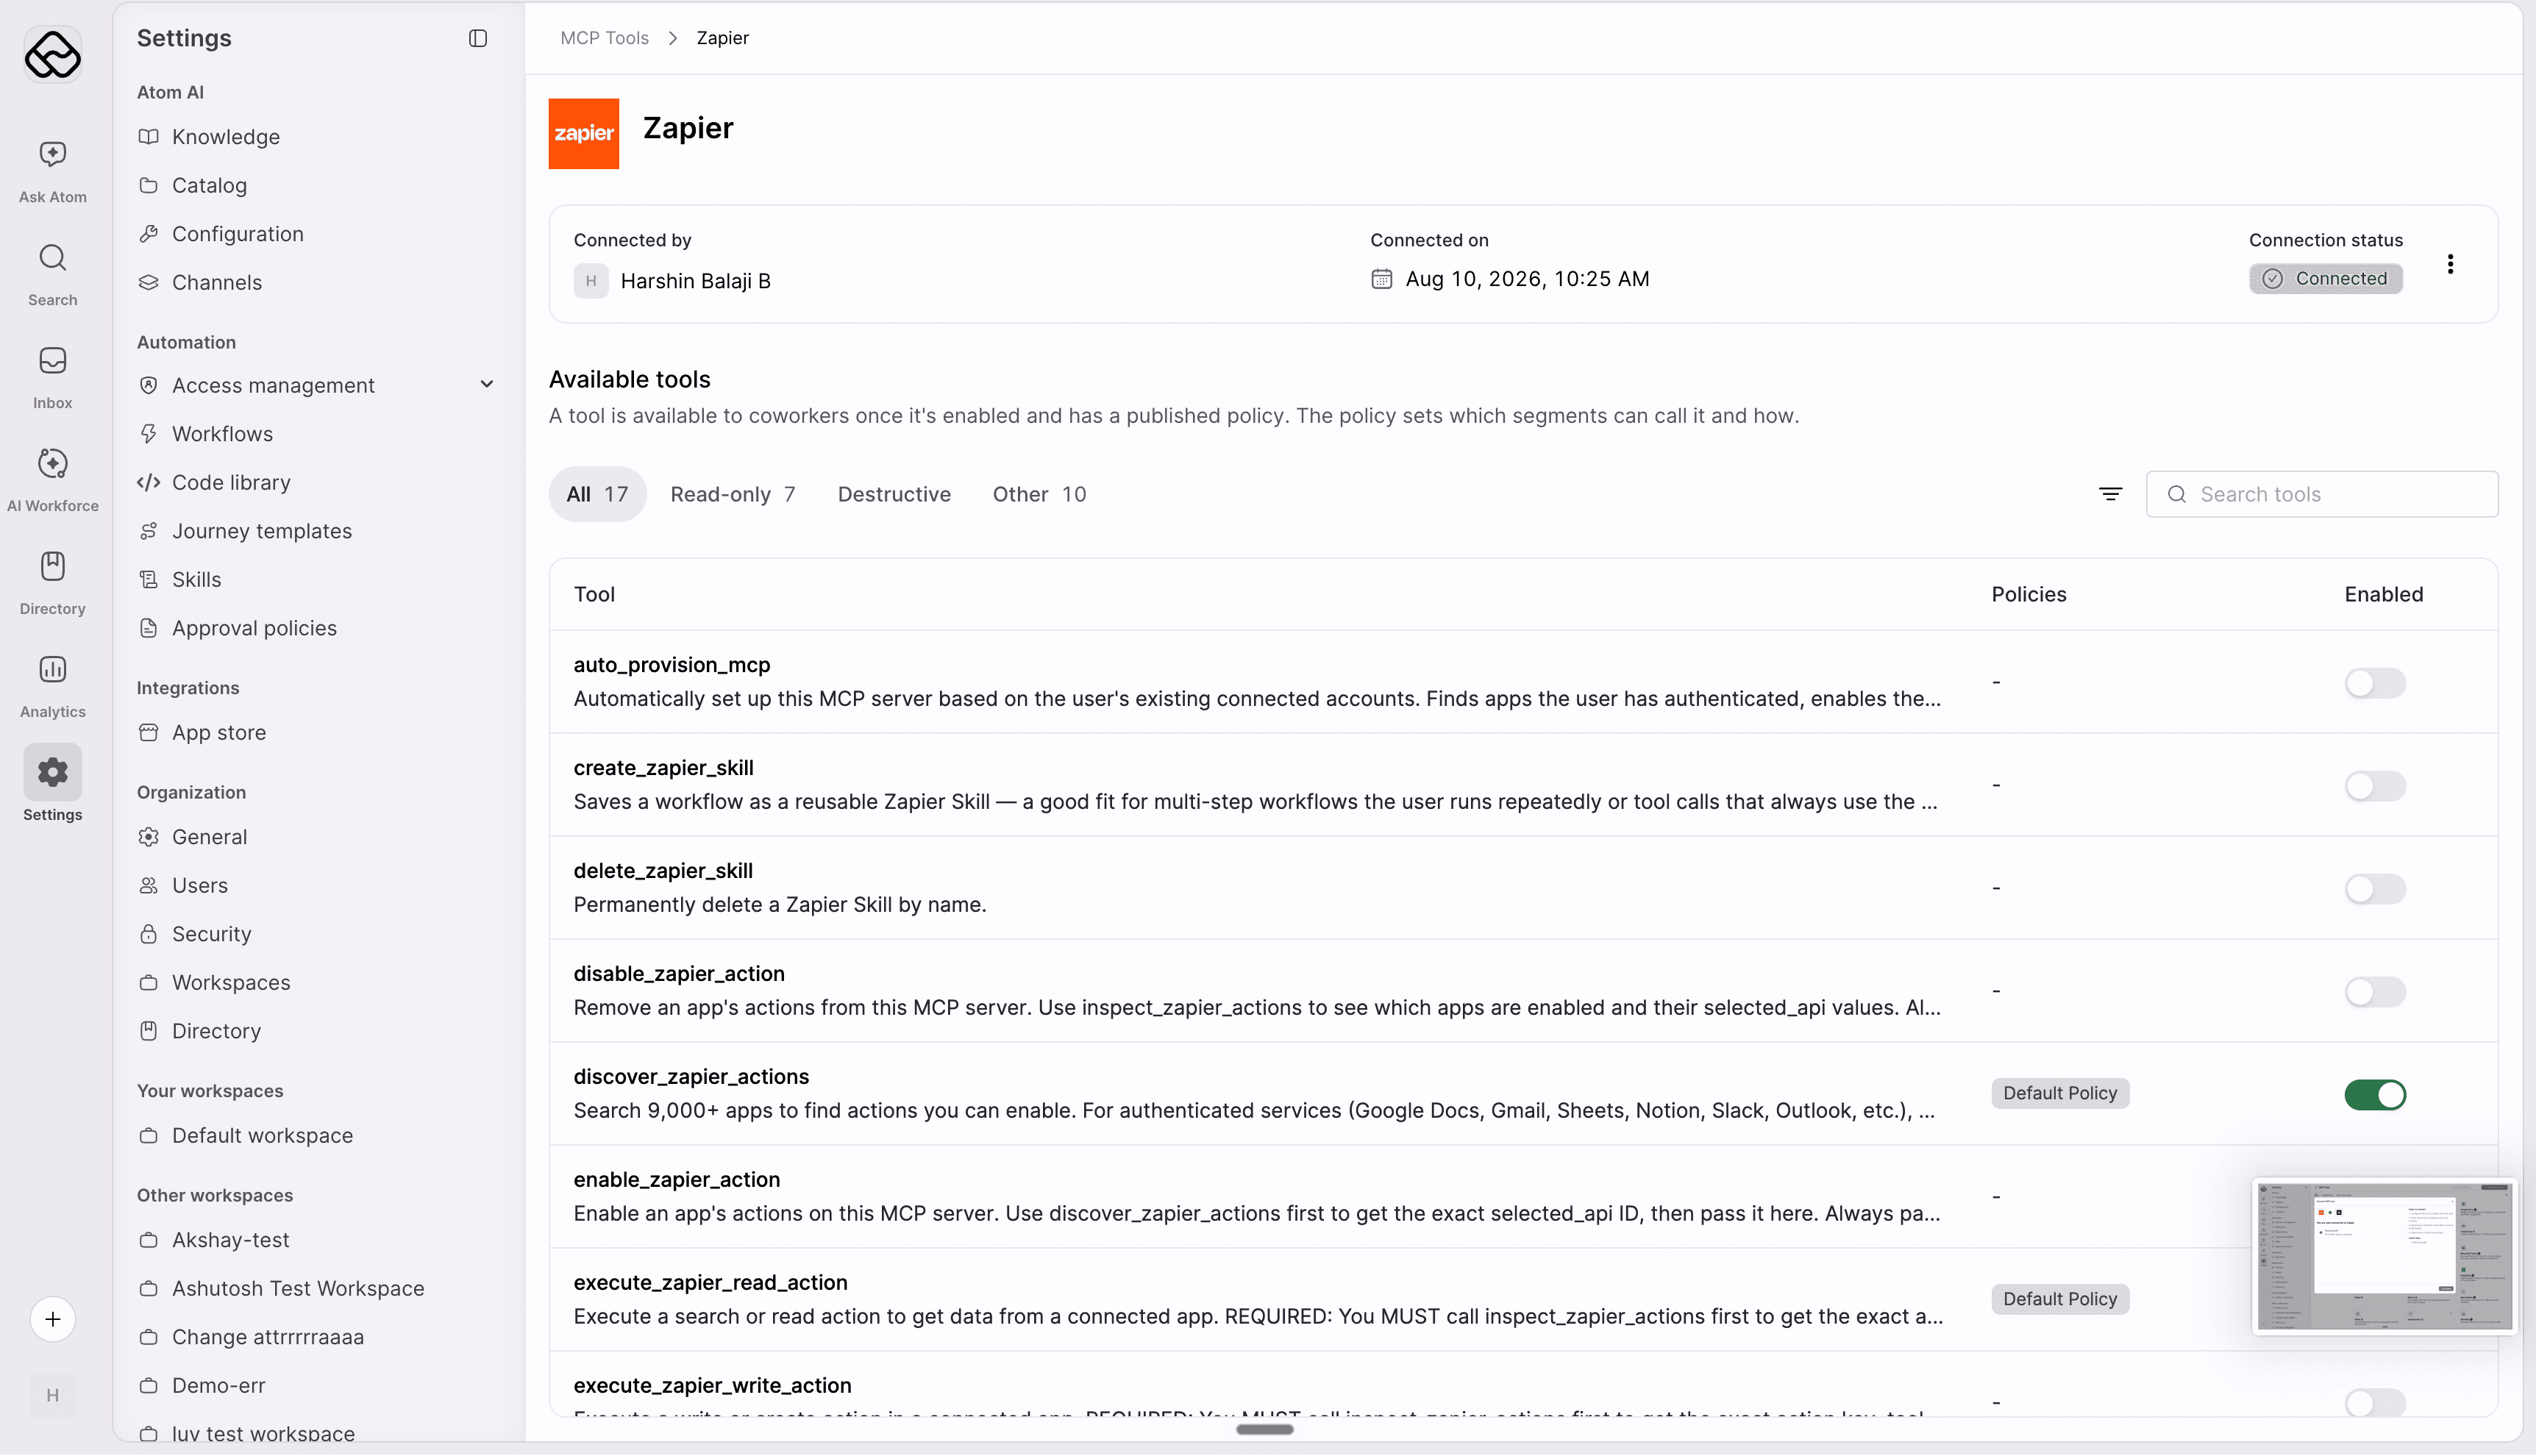
A tool is available to coworkers once it is enabled and has a published policy. The policy sets which segments can call it, and how. Tools are grouped into Read-only, Destructive, and Other, so you can see which ones change data before you enable them.
For detailed instructions on configuring your agents, see our guide on Setting up an AI Coworker.
Manage a custom MCP
Open the server and use the actions menu on the connection card.
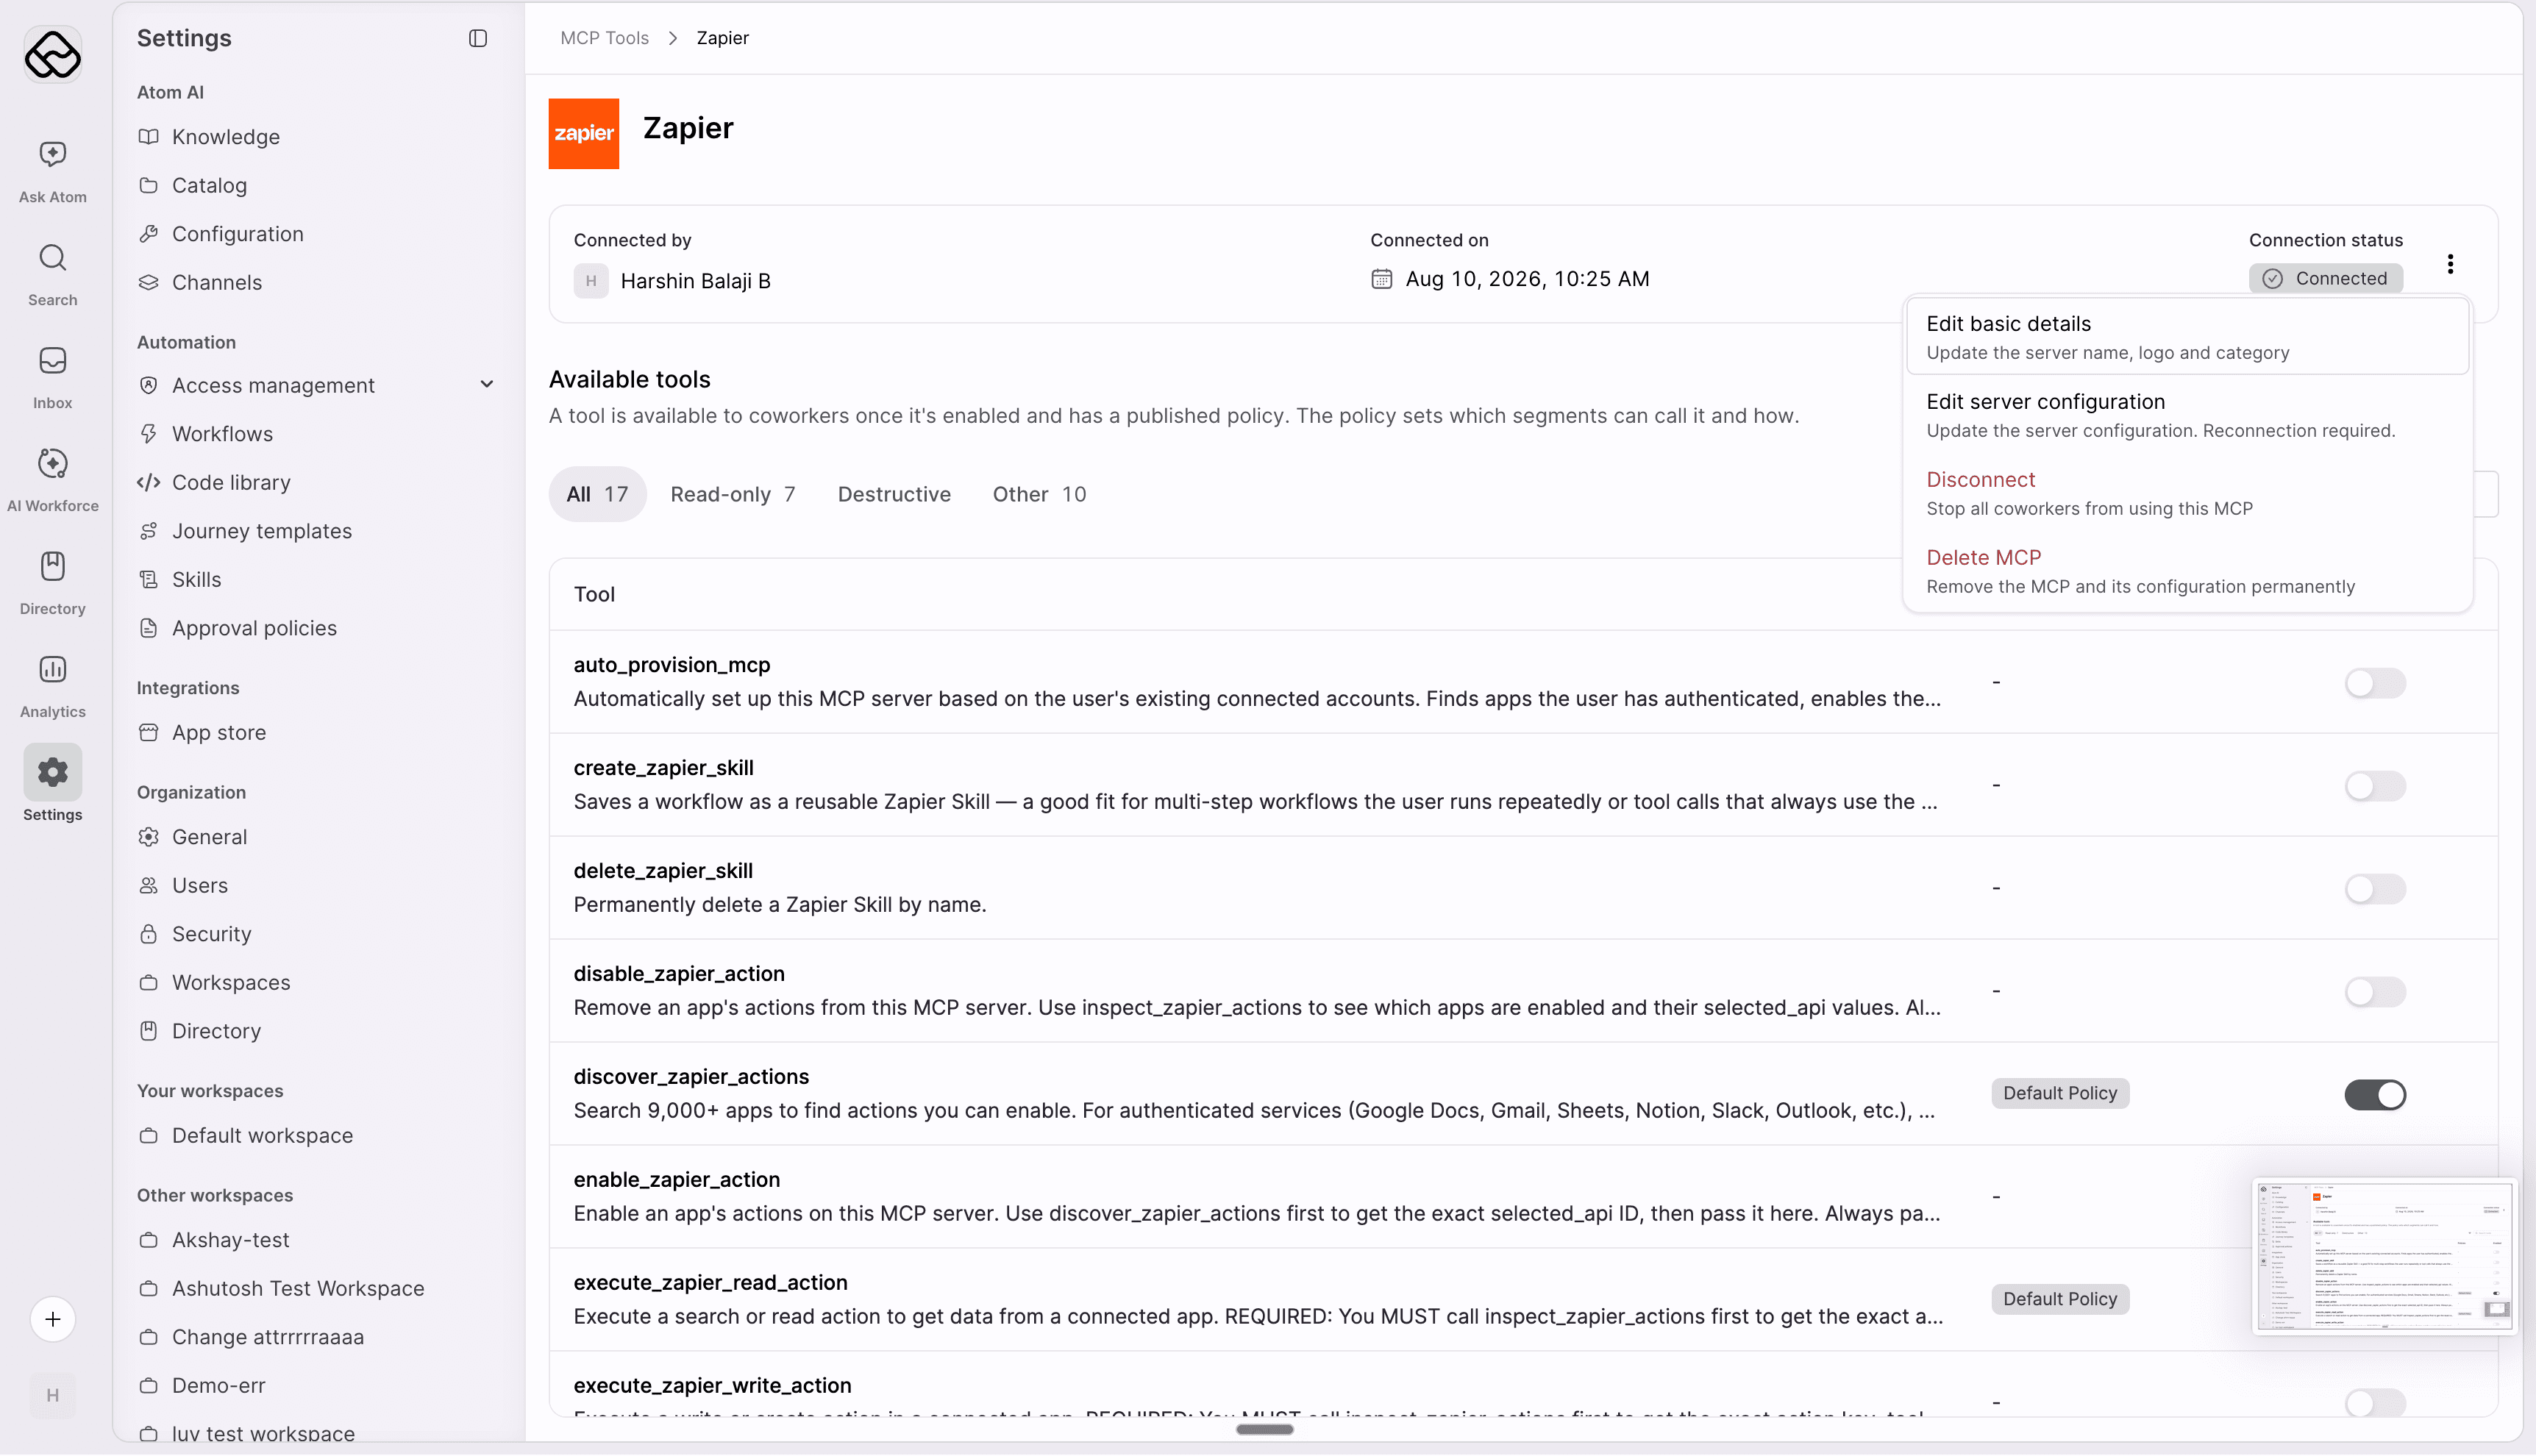
| Action | What it does |
|---|---|
| Connect | Appears when the server is not connected. Reopens the credentials or authorization step. |
| Edit basic details | Updates the server name, logo, and category. Does not affect the live connection. |
| Edit server configuration | Updates the URL, authentication method, or OAuth settings. Reconnection is required. |
| Disconnect | Ends the connection but keeps the configuration, so you can reconnect anytime. AI Coworkers that rely on it do not work as expected until you do. |
| Delete MCP | Removes the server and its configuration permanently. You cannot undo this. |
Editing configuration details requires re-authenticating. For example, if you add a scope, the existing token still carries the old scopes, so you need to reconnect for the change to take effect. Changing the issuer, endpoints, scopes, or client ID puts the connection into a Needs reconnect state. Changing only the client secret does not.
You cannot change the slug once the server is created. To change it, delete the server and add it again.
Troubleshoot common issues
Refer to the following table to resolve issues you may encounter:
| Issue | Cause | Resolution |
|---|---|---|
| The URL must use HTTPS | The URL starts with http:// or has no scheme. | Enter the full URL starting with https://. |
| The URL resolves to a private or internal network address | The server is only reachable inside your network. | Expose the server at a publicly reachable HTTPS endpoint. |
| The hostname could not be resolved | The URL has a typo, or the host has no public DNS record. | Check the URL and confirm the server is reachable. |
| Configuration cannot be fetched | The server publishes no discovery details, or the endpoint is not a valid MCP server. | Confirm the URL is the MCP endpoint, and then choose the authentication method and complete the fields manually. |
| A connector with this URL already exists | The same server URL is already added in this workspace. | Use the existing entry instead of adding a duplicate. |
| A connector with this slug already exists, or the slug is reserved | The slug is taken, or it matches a built-in catalog server. | Choose a different slug. |
| Use lowercase letters and numbers only | The slug has capitals, spaces, hyphens, or underscores. | Use only the characters a to z and 0 to 9. |
| Header name is not allowed | Custom headers cannot override protocol headers such as Host, Content-Length, or Connection. | Use the header name the server expects for its credentials. |
| Authentication fails | Authorization was denied, the 10-minute window elapsed, or the API key is wrong. | Re-authorize, or re-enter a valid key, and then connect again. |
| Your browser blocked the authorization tab | A pop-up blocker prevented the tab from opening. | Use the link in the dialog, or allow pop-ups for your Atomicwork domain. |
| The MCP cannot be deleted because it is still in use | Active connections still exist. | Disconnect it everywhere it is used, and then delete it. |
| The connection shows Needs reconnect | The token could no longer be refreshed, or an admin edited the OAuth configuration. | Use Connect from the actions menu to re-authorize. |
Understand how your credentials are secured
- Credentials are stored encrypted and are never shown again after you save them.
- OAuth tokens never reach the browser. The code exchange, token storage, and refresh all happen server-side, protected with PKCE.
- Consent requests are short-lived, at 10 minutes, and single-use.
- Atomicwork connects to your server over HTTPS only, and blocks URLs that resolve to internal or private addresses.